Snikket: Getting Started (Android)
You received a Snikket invitation and want to get started using an Android device? You are at the right place. Let’s get started. This tutorial is written as a short story which you can translate to your personal use case.
Background Story
Mary, Robert and Kim are cycling enthusiasts. They want to communicate with each other using their smartphones. Mary suggests to use Snikket to communcate with each other. Kim and Robert do not know Snikket but they are always motivated to try something new.
Mary prepares Snikket invitations for the server snikket.eversten.net and sends them via e-mail to Robert and Kim.
Kim is an Android user and Mary tells her that she can download the Snikket app from the Play Store.
We will now have a look at her onboarding process using Snikket.
Chapter 1: Installing Snikket
At first, Kim opens the Play Store on her phone and searches for the app Snikket. She clicks on the Install icon to install it. When she opens Snikket for the first time, Snikket tells her that she needs an existing Snikket account or an invitation to use this app.
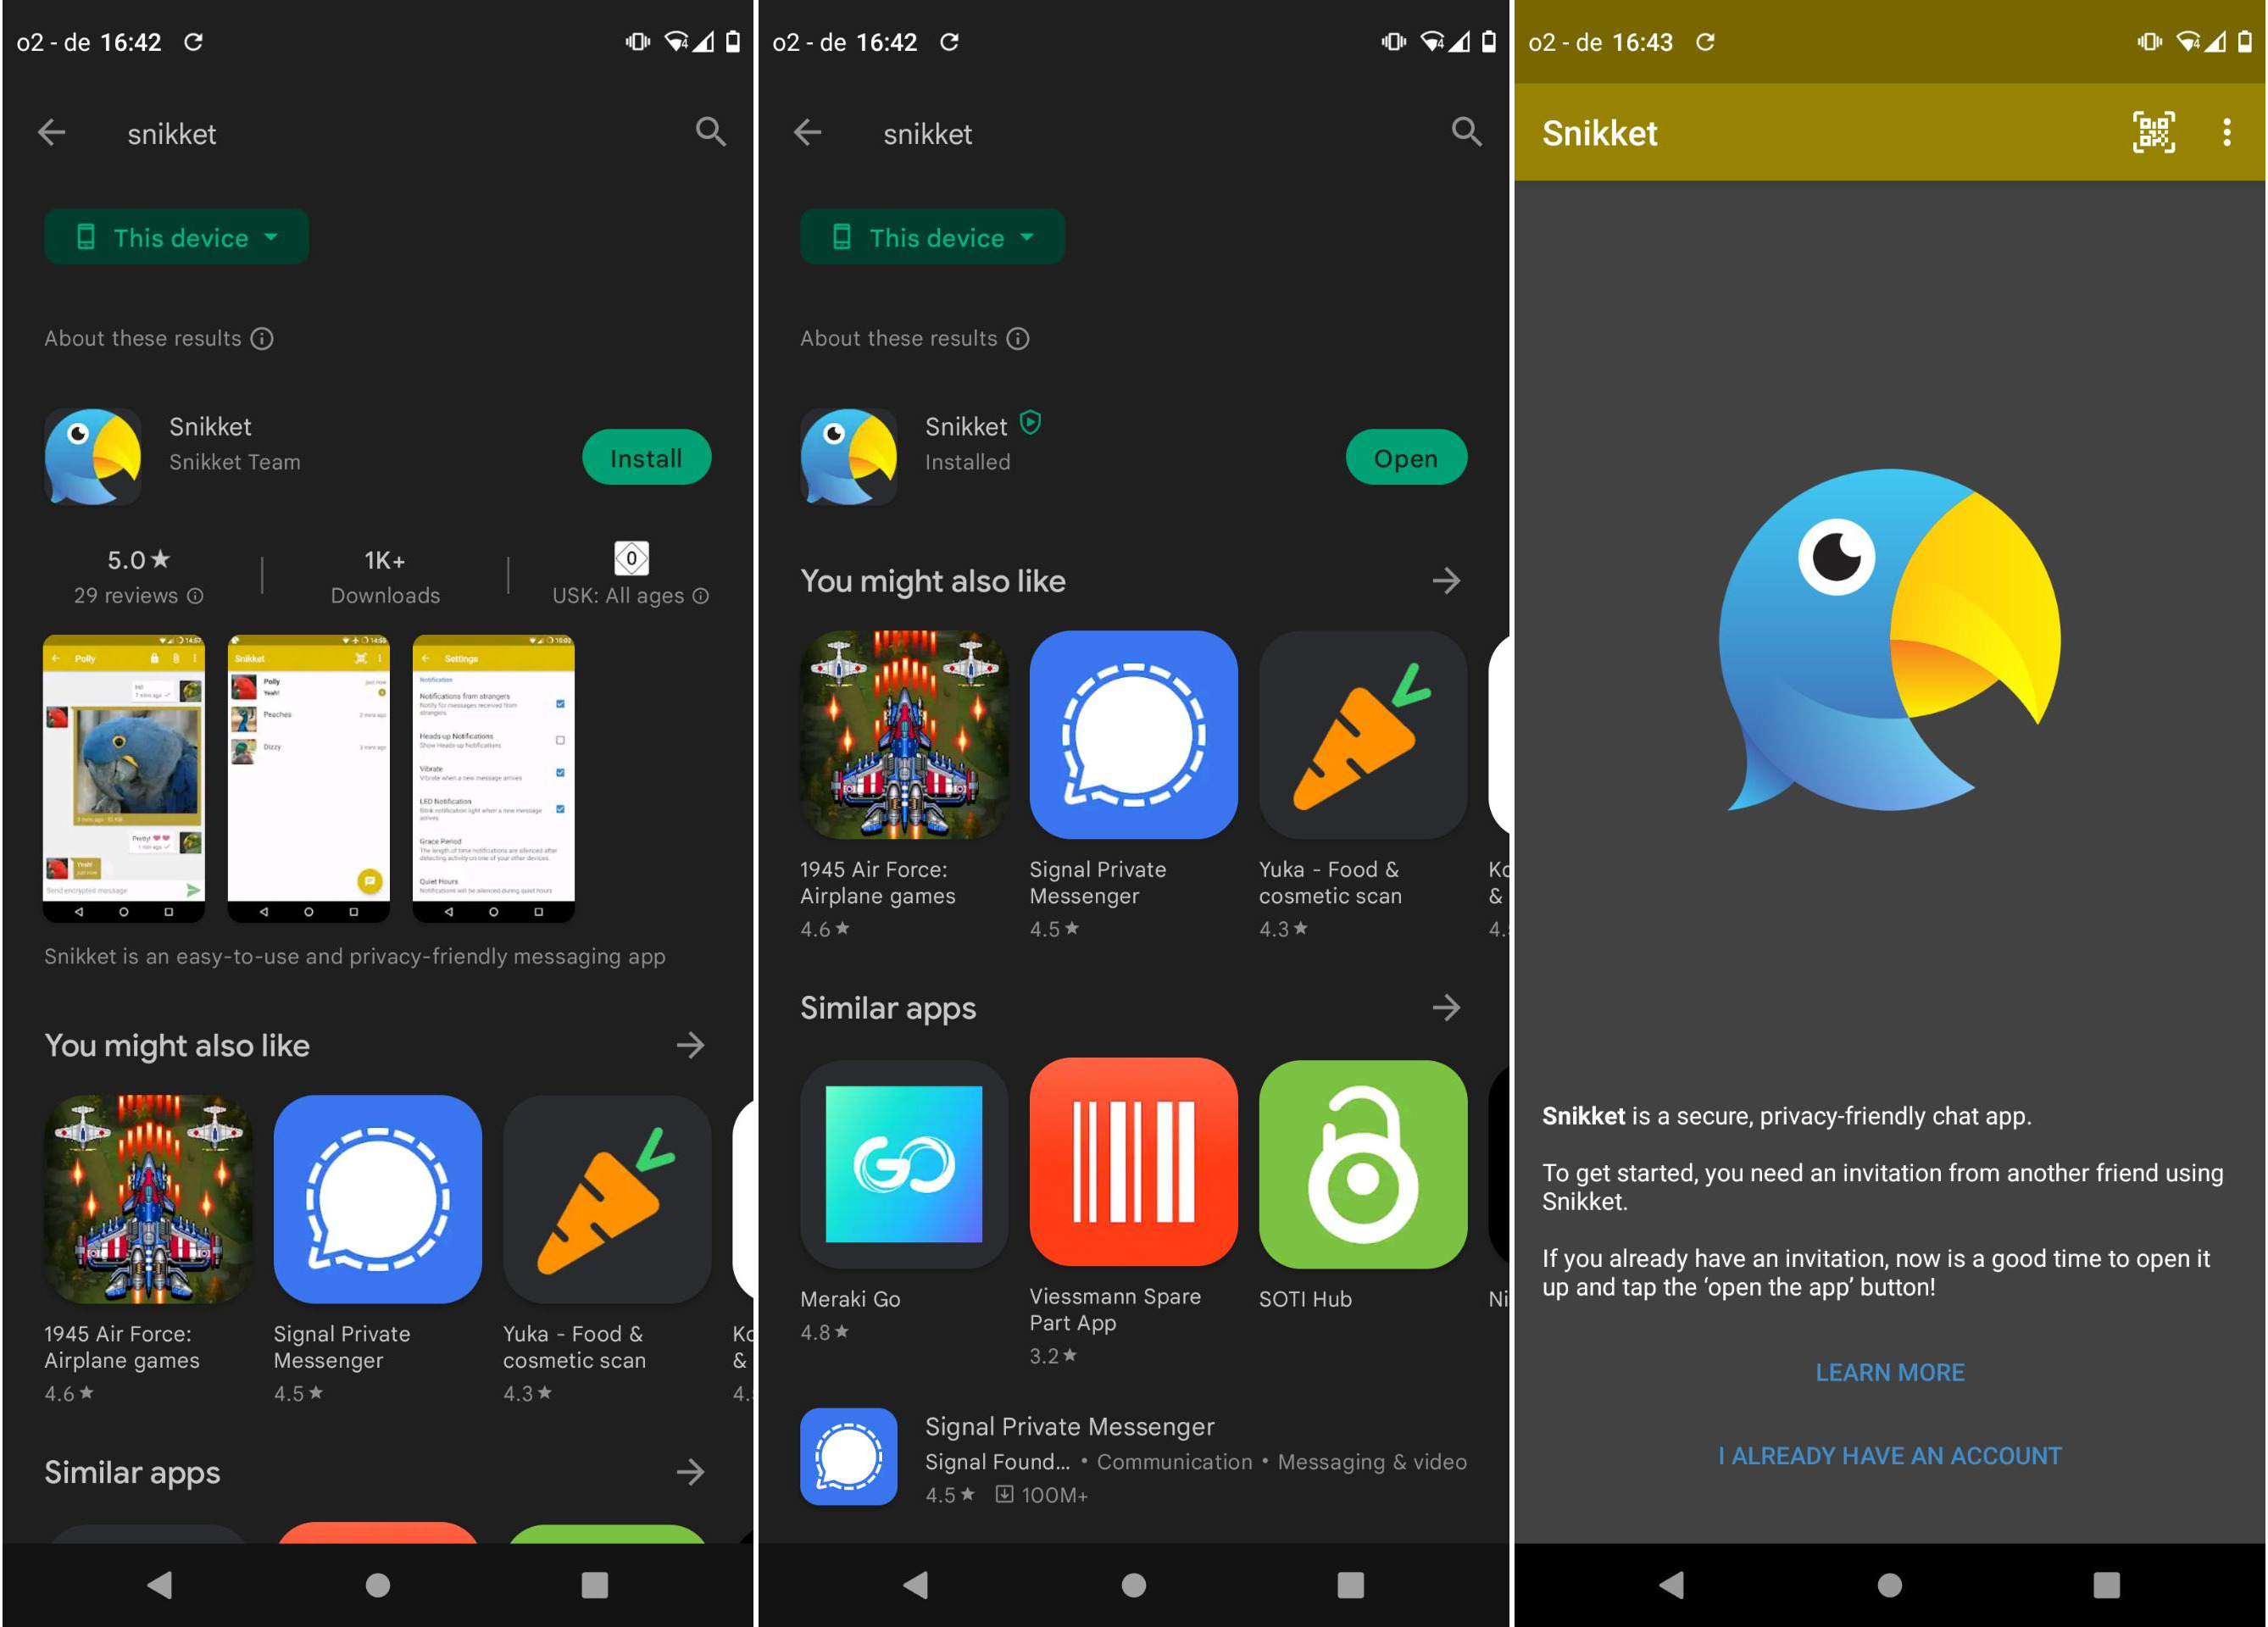
She now closes the app.
Chapter 2: Accepting the Snikket Invitation
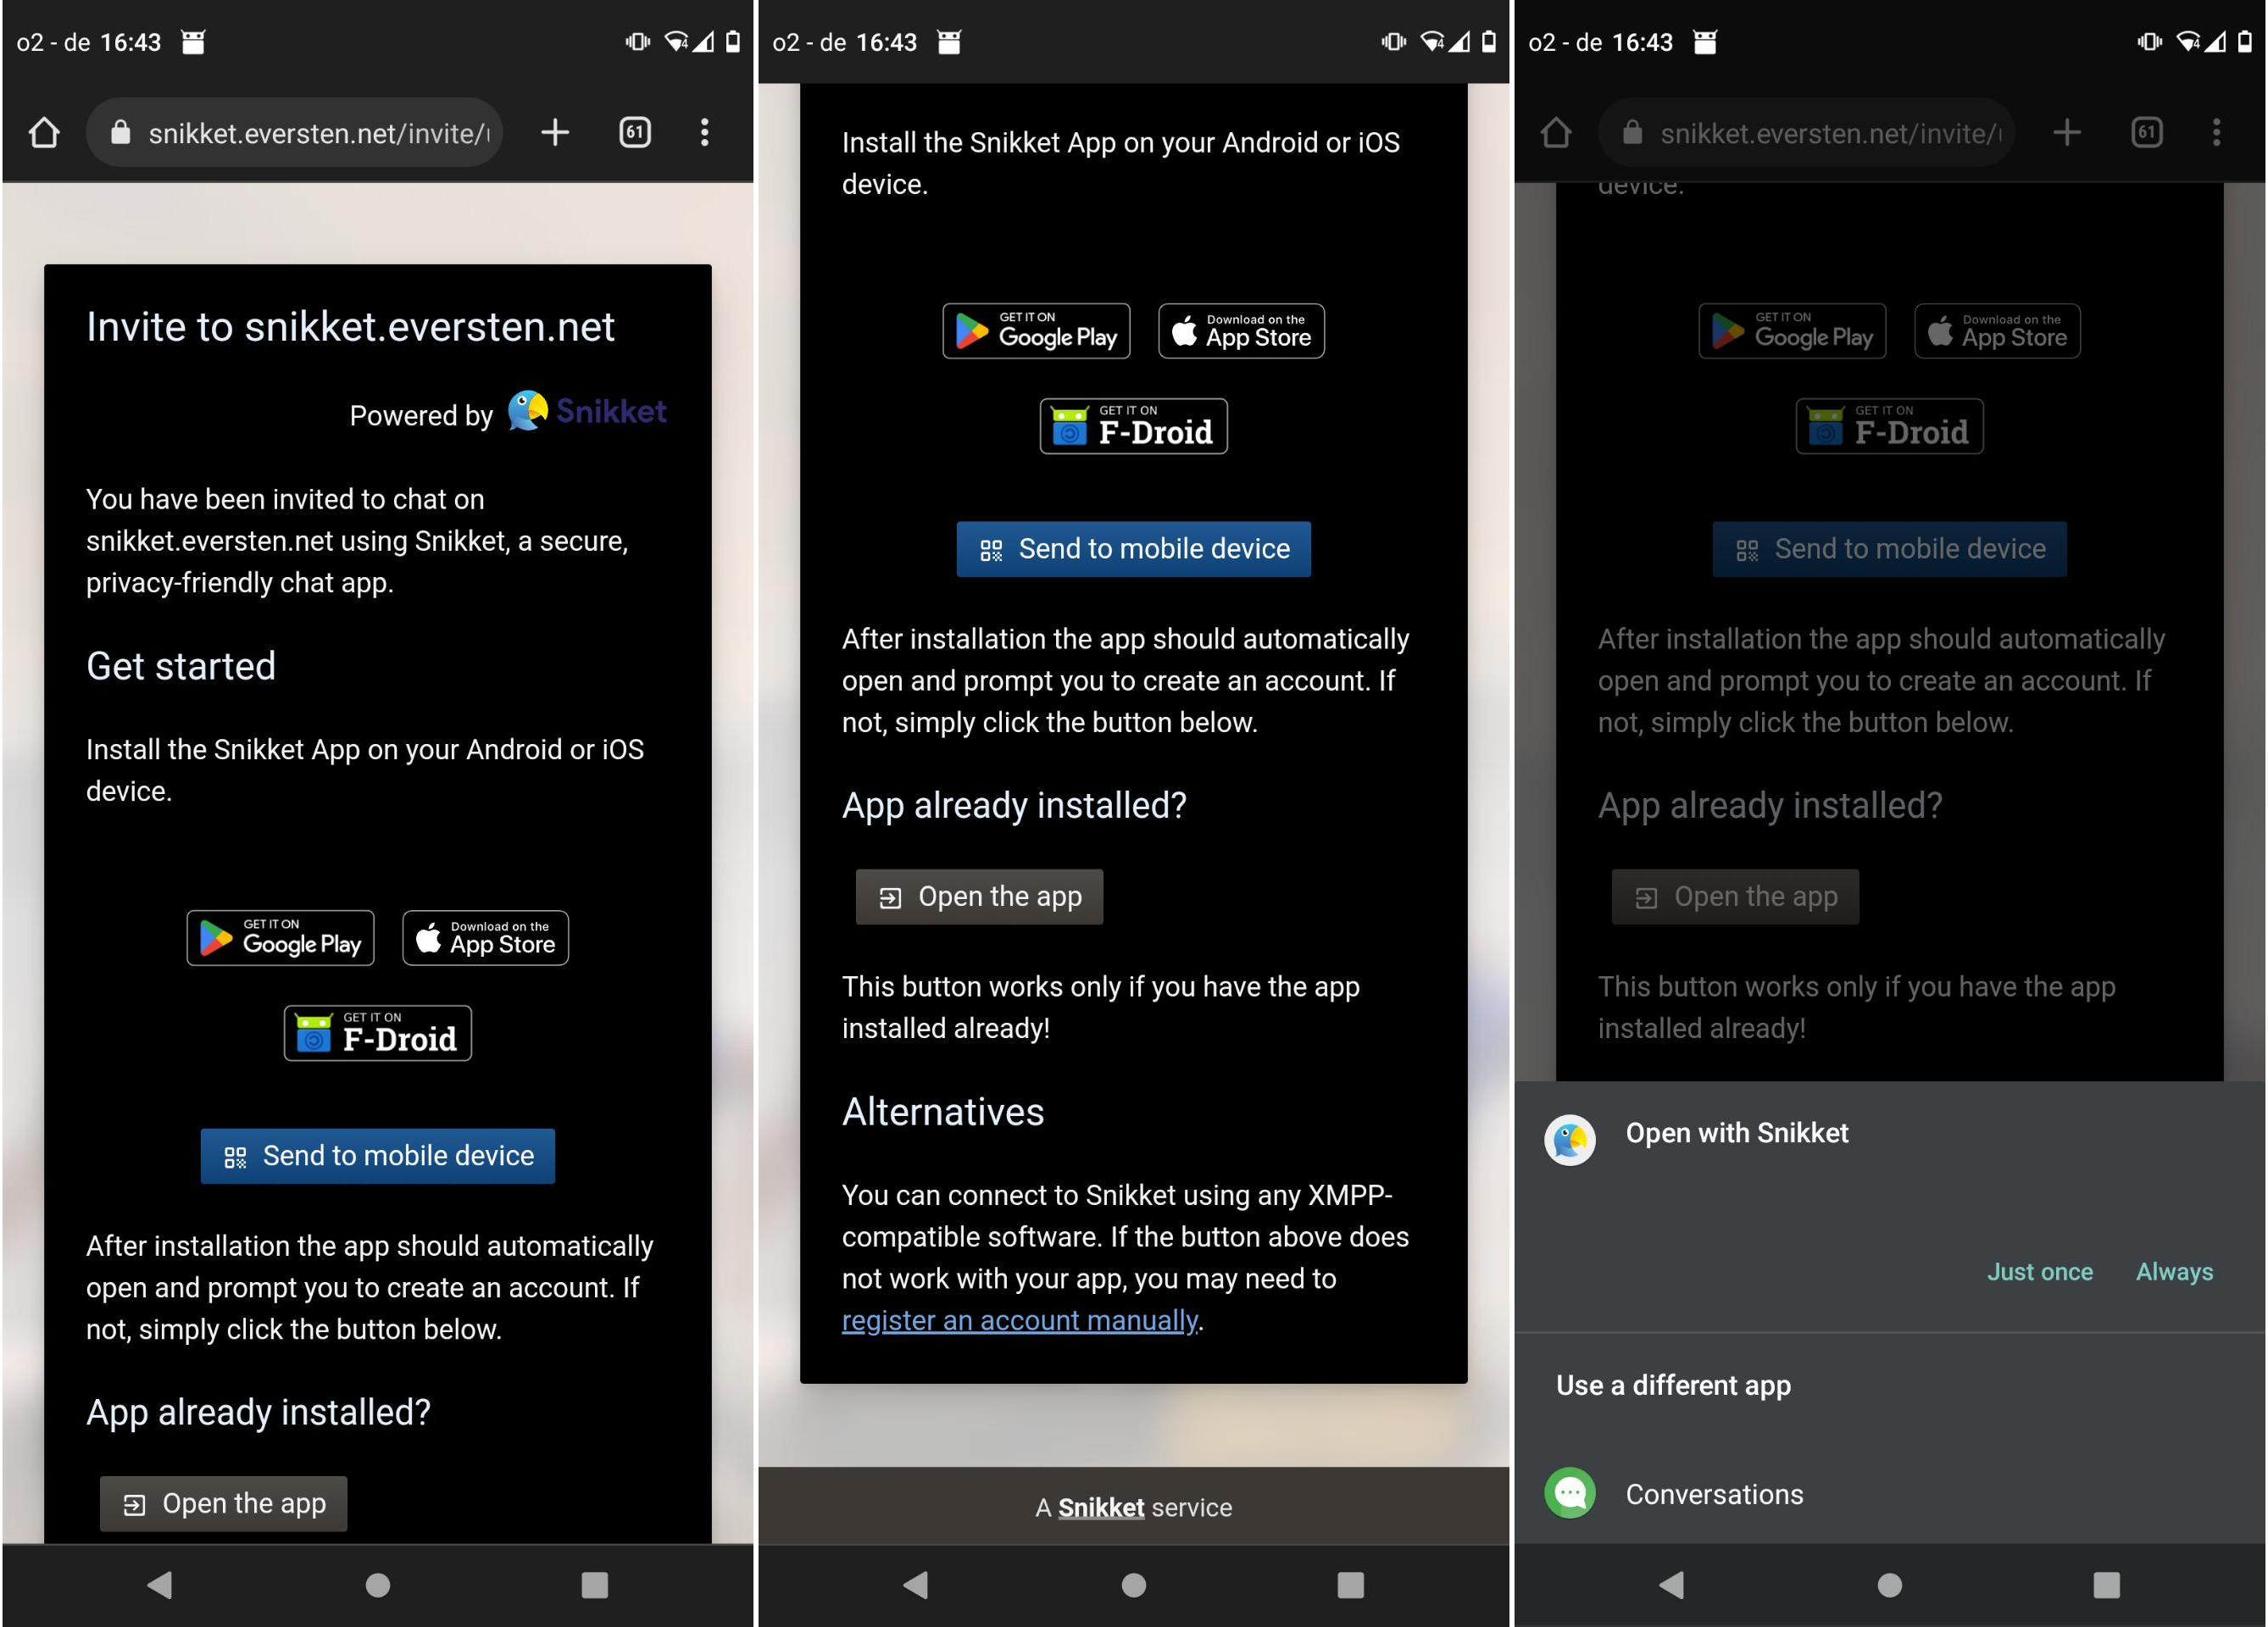
Kim opens the e-mail containing the invitation from Mary. She clicks on the invitation link. Her browser opens and shows the invitation. The invitation says that she should install Snikket on her phone. She already did so. She simply clicks on the button Open App. Afterwards, she is asked whether she wants to open this link using Snikket. She confirms this message by selecting Just Once.
Now she has to decide which username she wants to use. She decides to use the username kim and clicks Next. On the next screen she sees her selected username and a pregenerated password. She can see the generated password when she clicks on the crossed out eye beside the password line. She can now accept the generated password or she can guess an own secure password and enter it in that line. She decides to use the pregenerated password and clicks Next.
Important: Kim used the username kim and she registered on the server snikket.eversten.net. This means her real XMPP address is: kim@snikket.eversten.net. She can chat with anyone who is also using XMPP. The other person can also use a different server than snikket.eversten.net.

Her username is available and she receives a welcome message of the server which she can ignore at this moment. She decides to use a profile picture by clicking on the green square (with a K in it) and selects a picture. Afterwards, she clicks Publish. Kim has to decide whether Snikket is allowed to access her contacts. Since Kim does not plan to add the XMPP addresses of her contacts to her android address book she denies this message.
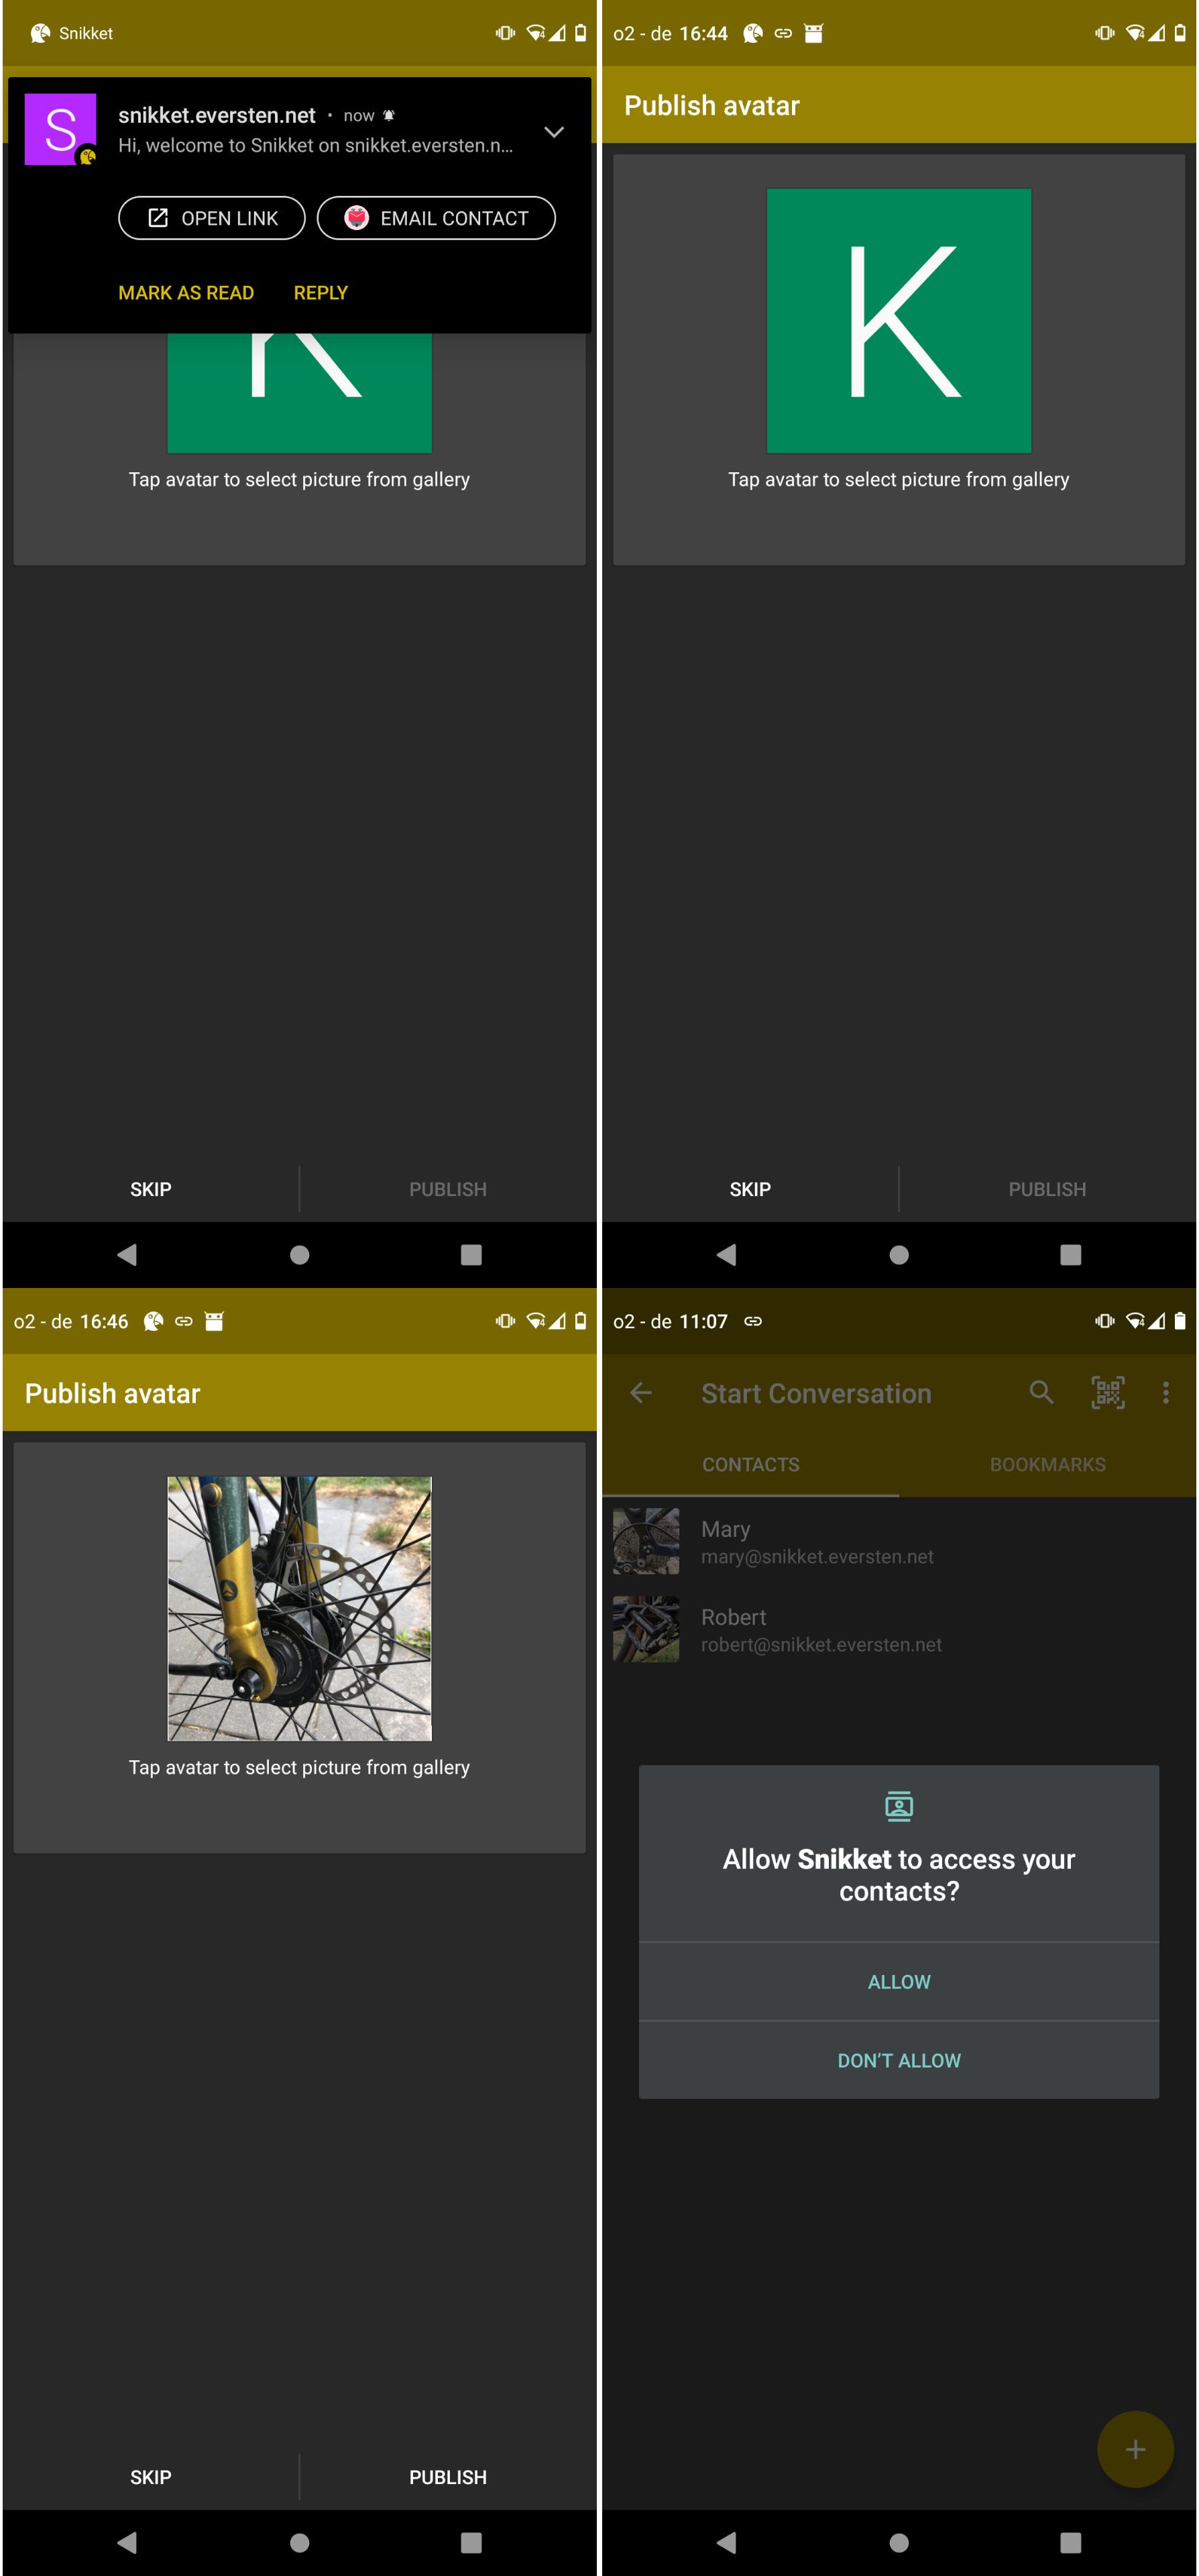
Kim successfully registered her account.
Chapter 3: Getting started with Snikket
Now, Kim sees her Snikket contact list. It is not empty? Why?
In this example, Mary is administrator of a Snikket server. She created a so-called Snikket circle Cycling Team. She invited Robert and Kim to join. Robert already joined Snikket. This means: When Kim registered for Snikket, she was added to the circle Cyling Team and all members of this circle are added to her contact list. In this example Kim has the address kim@snikket.eversten.net.
Kim wants to set a display name for her Snikket account. This name is the name which new contacts see when she writes a message to them. She clicks on the three dots icon on the top right and selects Manage accounts. On the next screen, she clicks on her username. She now sees her account details. Since she decided to use the pregenerated password during the registration process, she is able to unhide her password (theres an crossed eye beside the password line). This would not be possible if she decided to guess an own password. She clicks the pen icon to enter a display name for her account, decides to use Kim S., clicks accept and leaves the account management by clicking the Back icon on the top left two times.
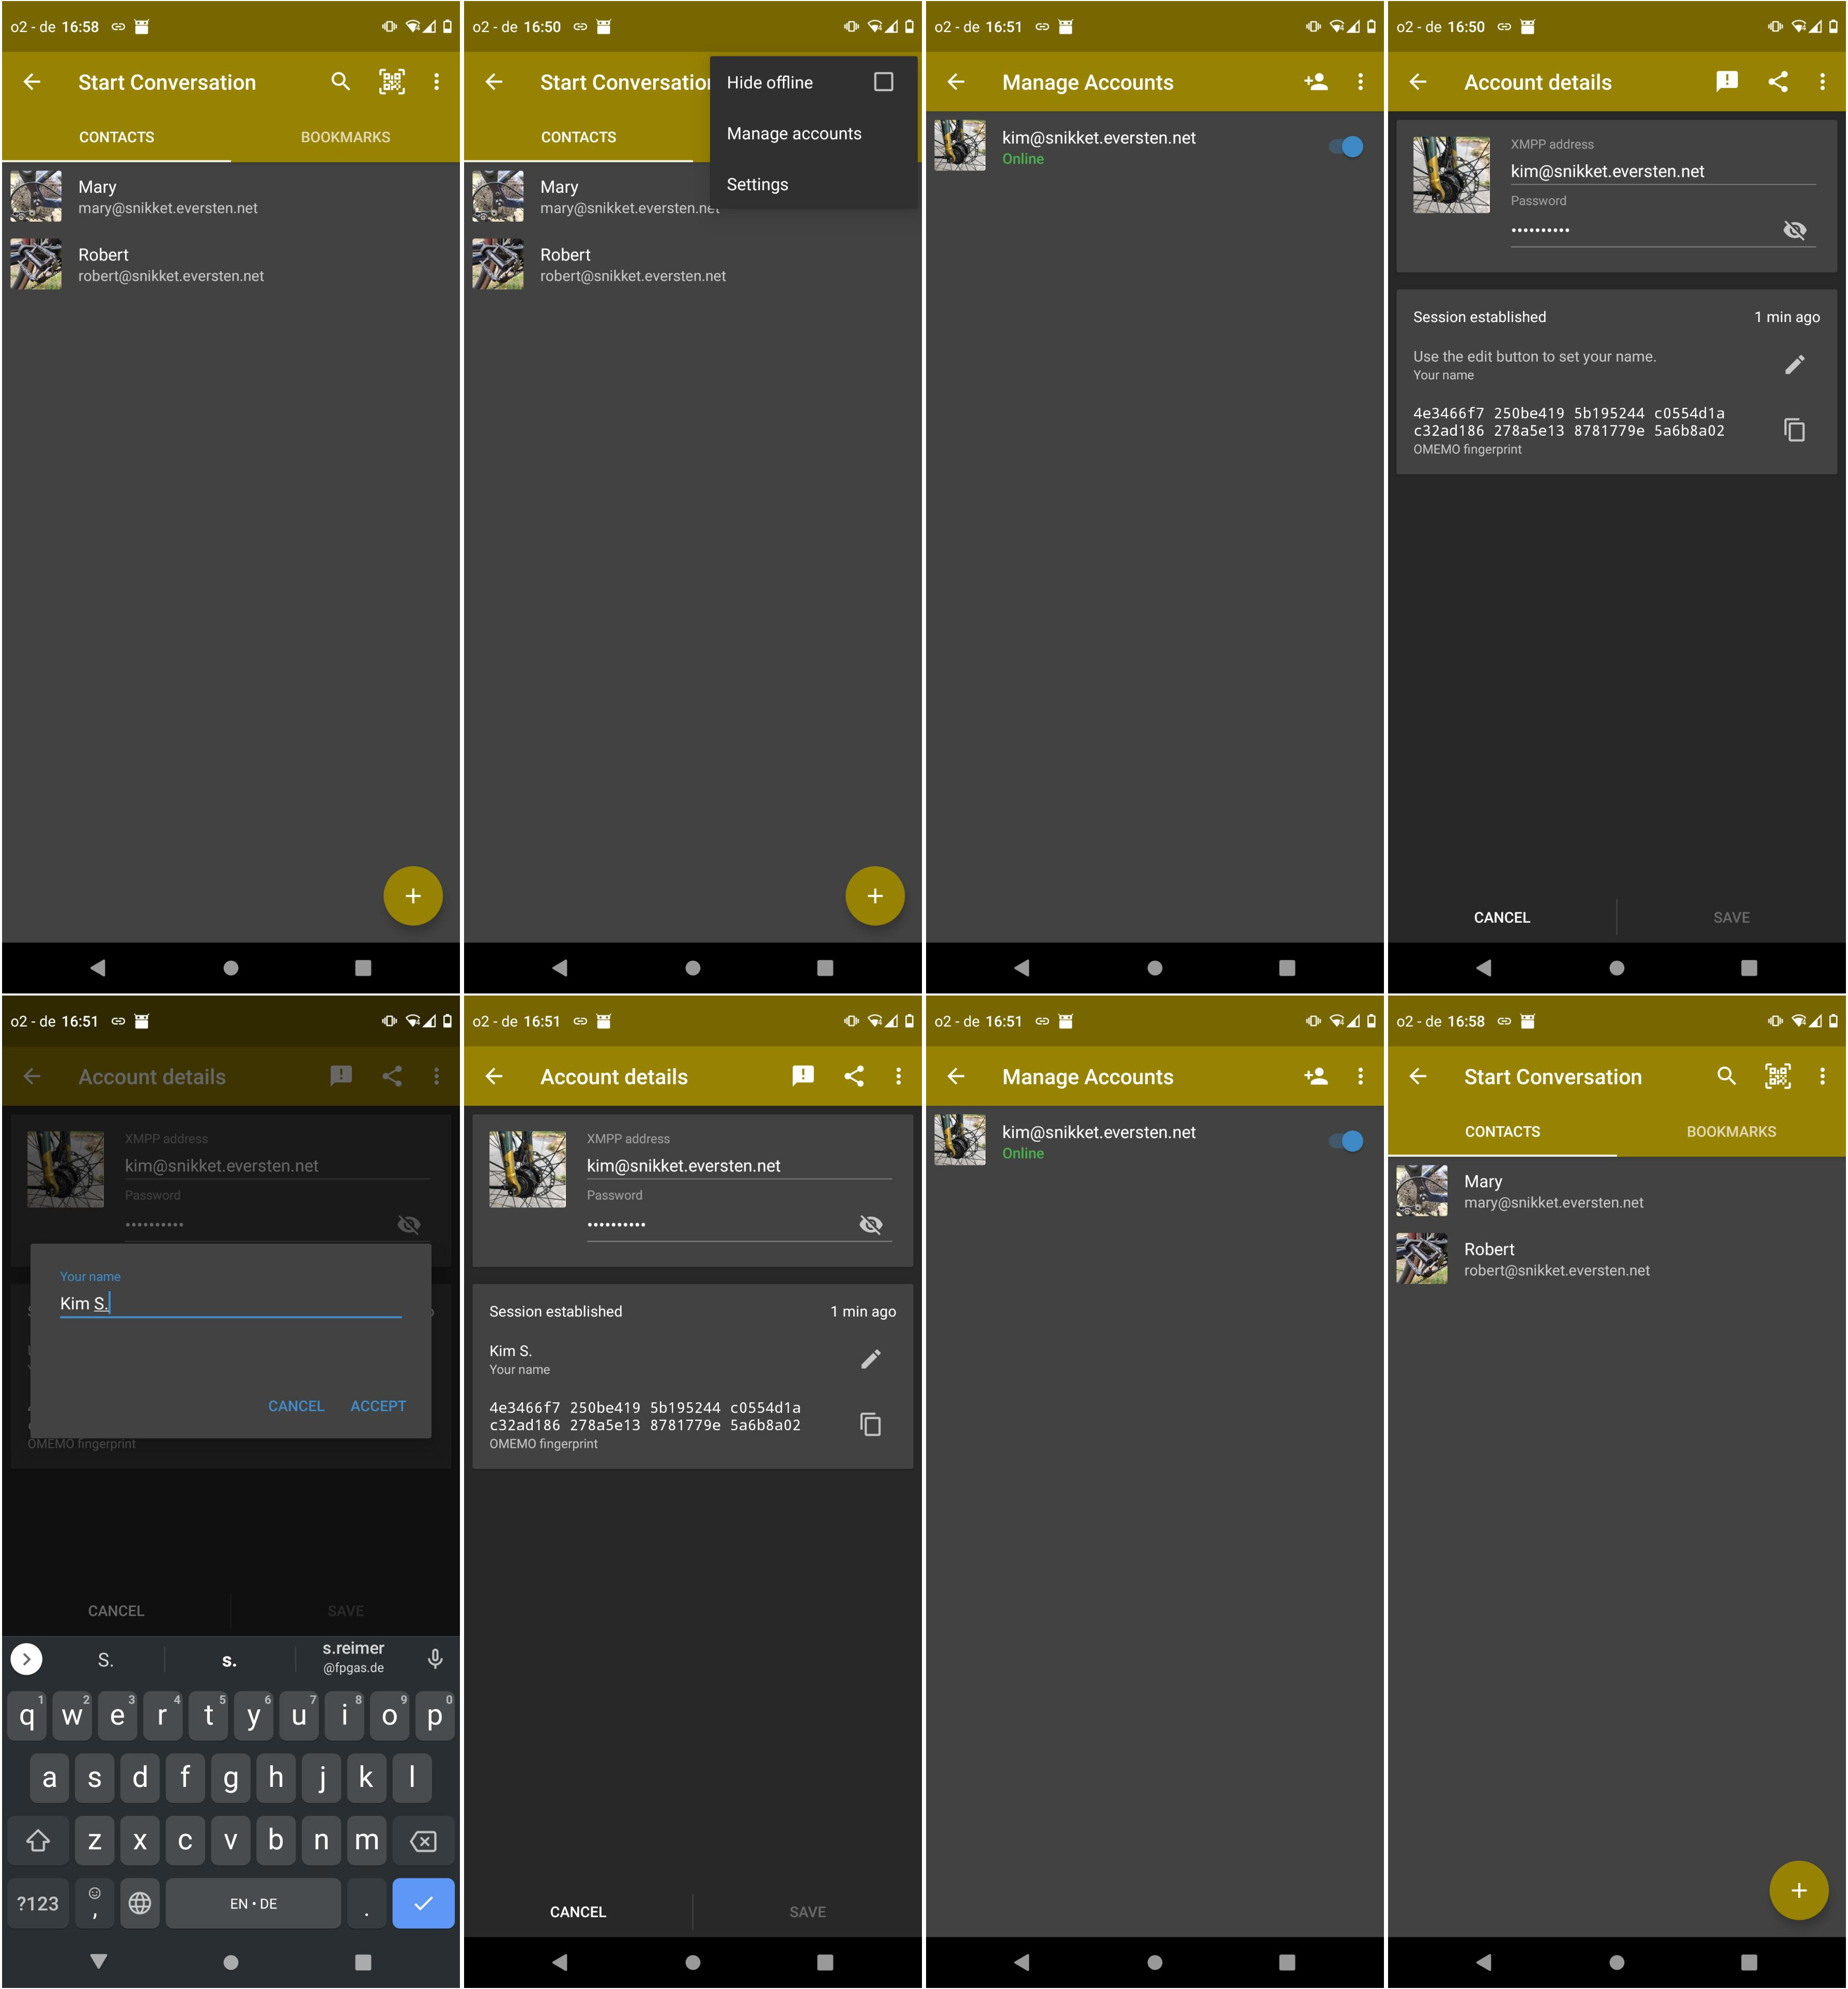
Kim is now back look at her contact list. She clicks the Back icon another time and is in the Chats view. The only available chat is the welcome message of the server. She clicks it, reads the message, and clicks the Back Button again to return to the Chats view. Here, she clicks on the chat bubble at the lower right corner of the screen to see her contact list again. She recognises that there are two tabs called Contacts and Bookmarks. She clicks on Bookmarks to see her group chats. She now clicks on Cycling Team and writes her first message and sends it. Now, Snikket shows a list of contacts for which this message will be end-to-end encrypted (the participants of this group chat). She confirms this message by selecting Done. After a while, she receives her first Snikket messages.

She clicks on the Back button and is in the Chats view. She opens the contact list again and selects Robert. Kim writes a message to send a private message to Robert. Afterwards, she clicks the Back button to get back to the Chats view. In the Chats view, Kim is annoyed by the server welcome message. So she swipes it to the left to remove it from the Chats view.
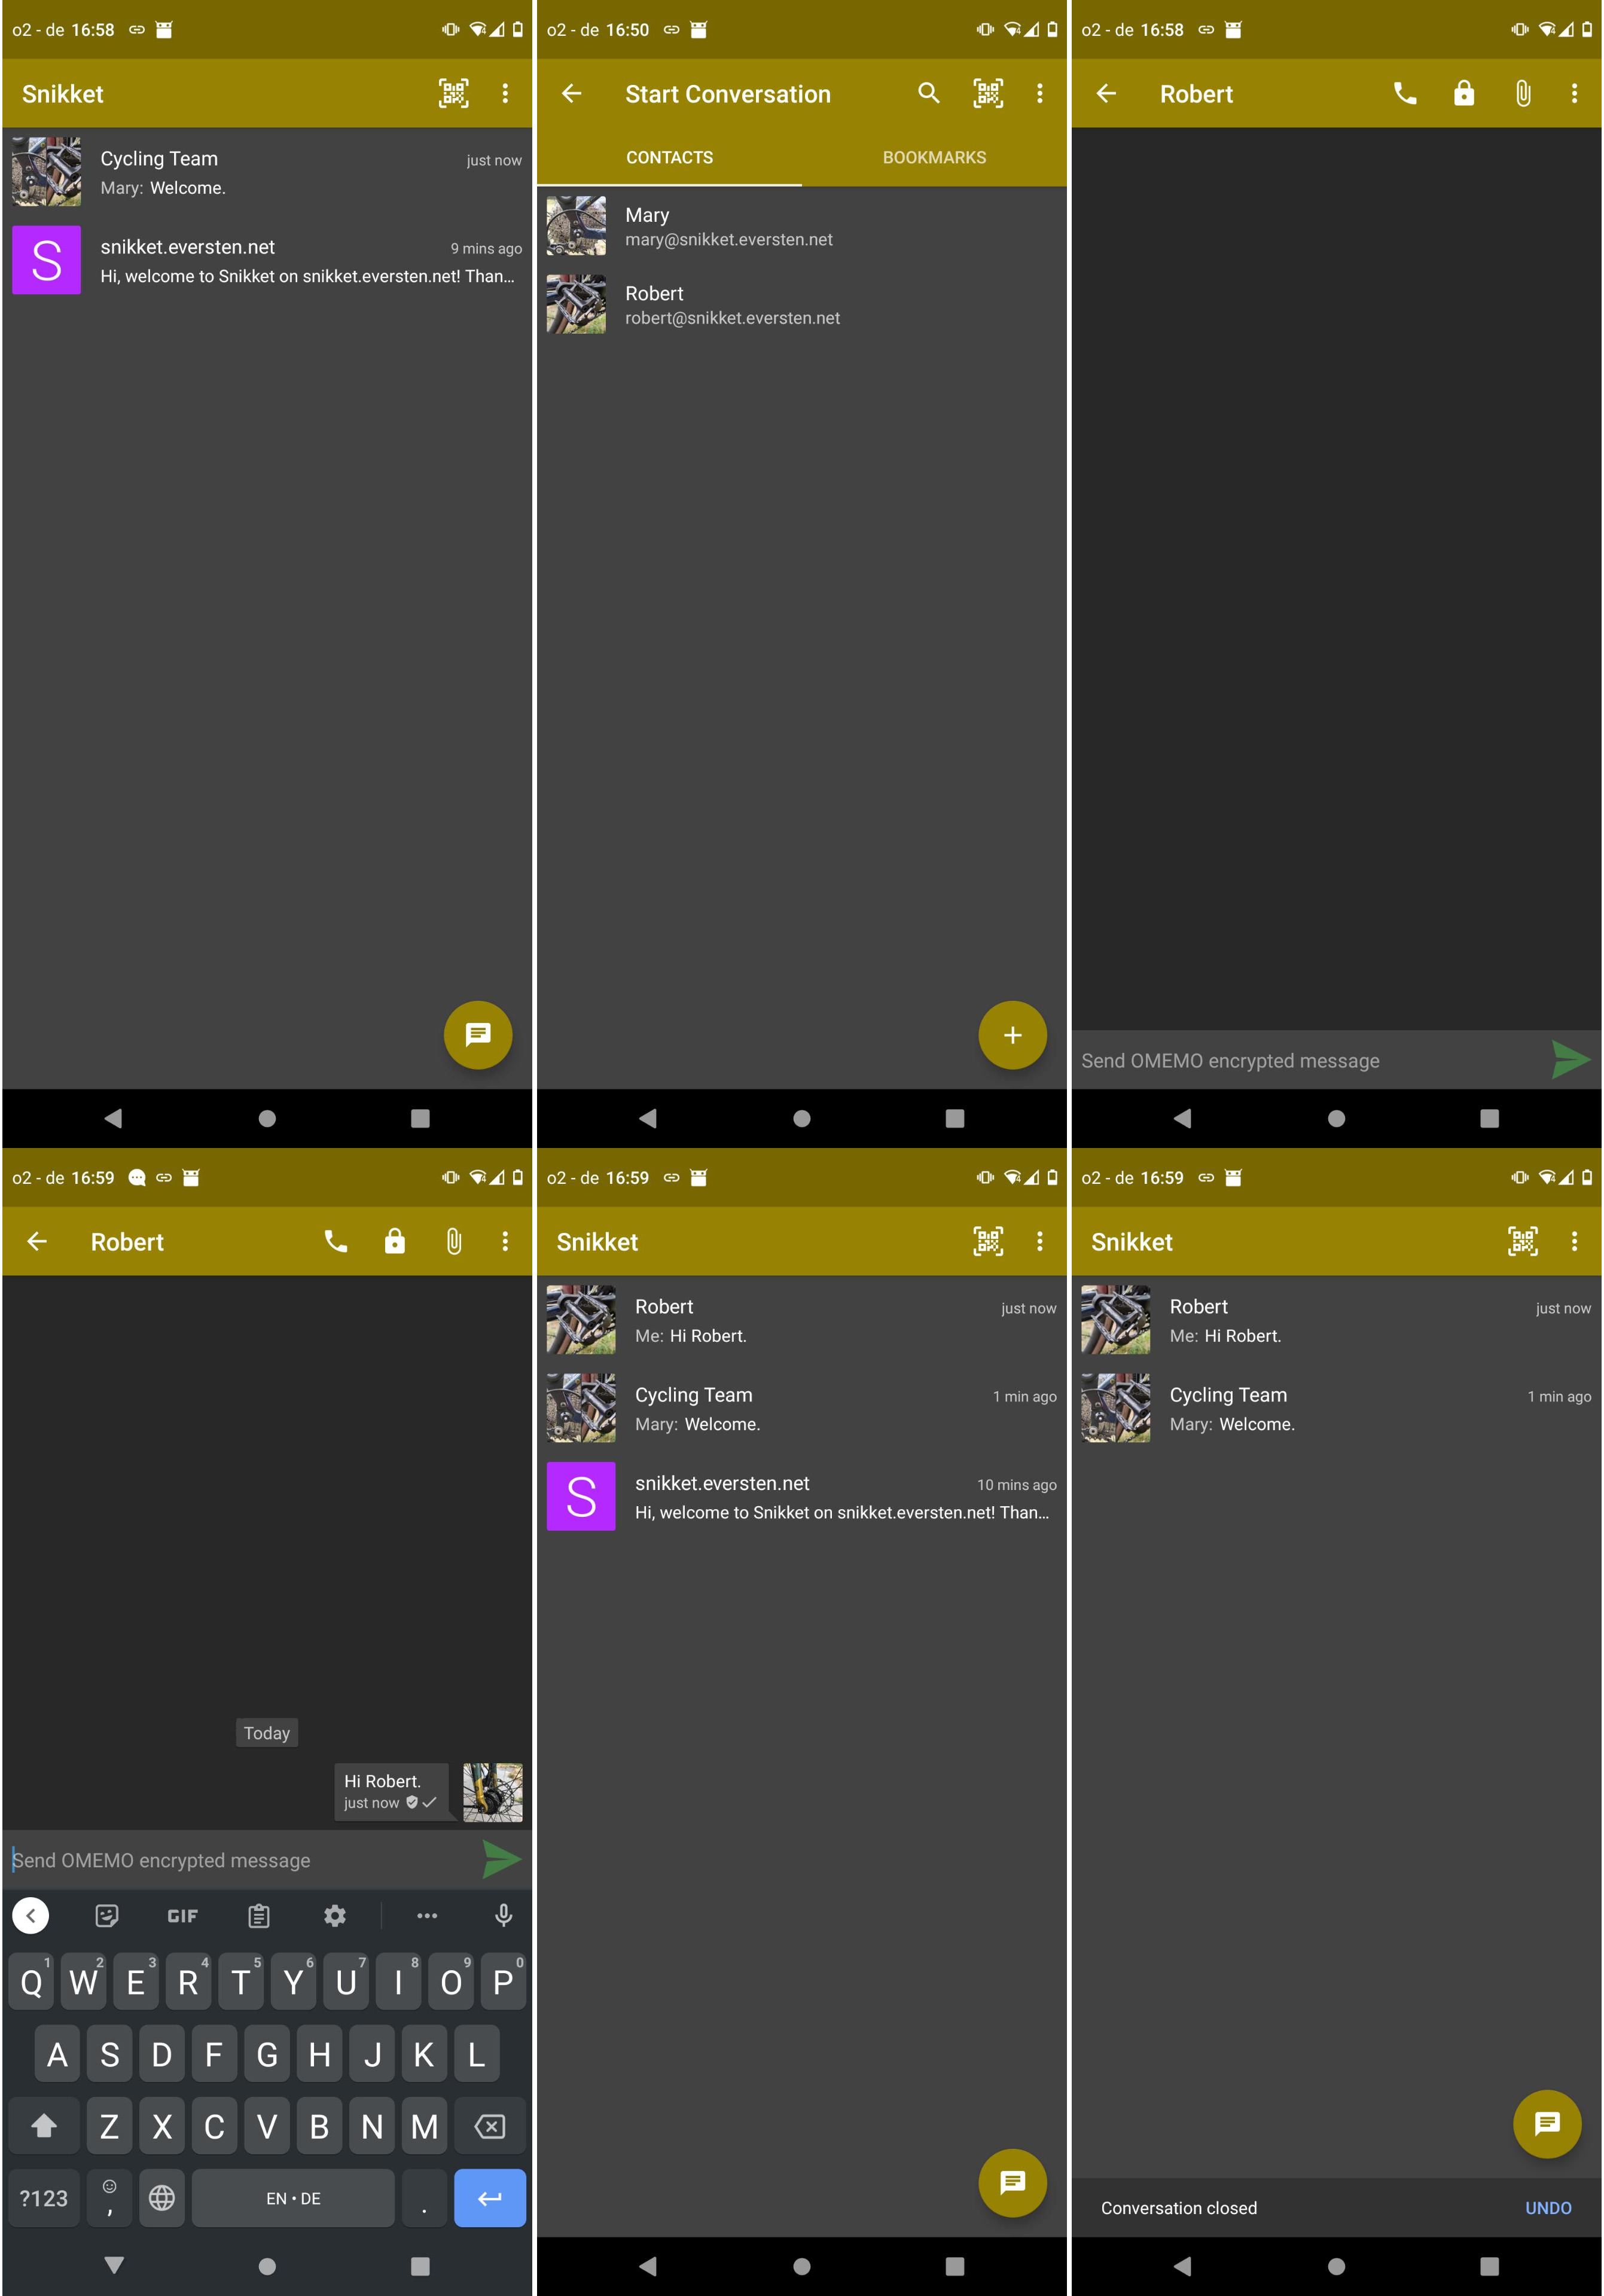
The Chats view looks better now to Kim.
Chapter 4: Adding Contacts from other Servers
The next day, Kim talks to her friend Michael and says that she now has a Snikket account. Michael is delighted and explains that he also uses XMPP. Kim asks for his XMPP address. It is michael1873@magicbroccoli.de. She opens the Contacts view and clicks on the plus icon at the bottom right and selects Add contact. She enters his XMPP address and confirms it by clicking Add. She writes a message to Michael. He answers instantaneously. Michael has to confirm that Kim is allowed to add him to her contact list. As soon as this happens he will be displayed as Michael instead of Michael1873 because Kim is allowed to see his display name and picture now. Kim returns to her contact list and sees that she can see Michaels display name and profile picture now.
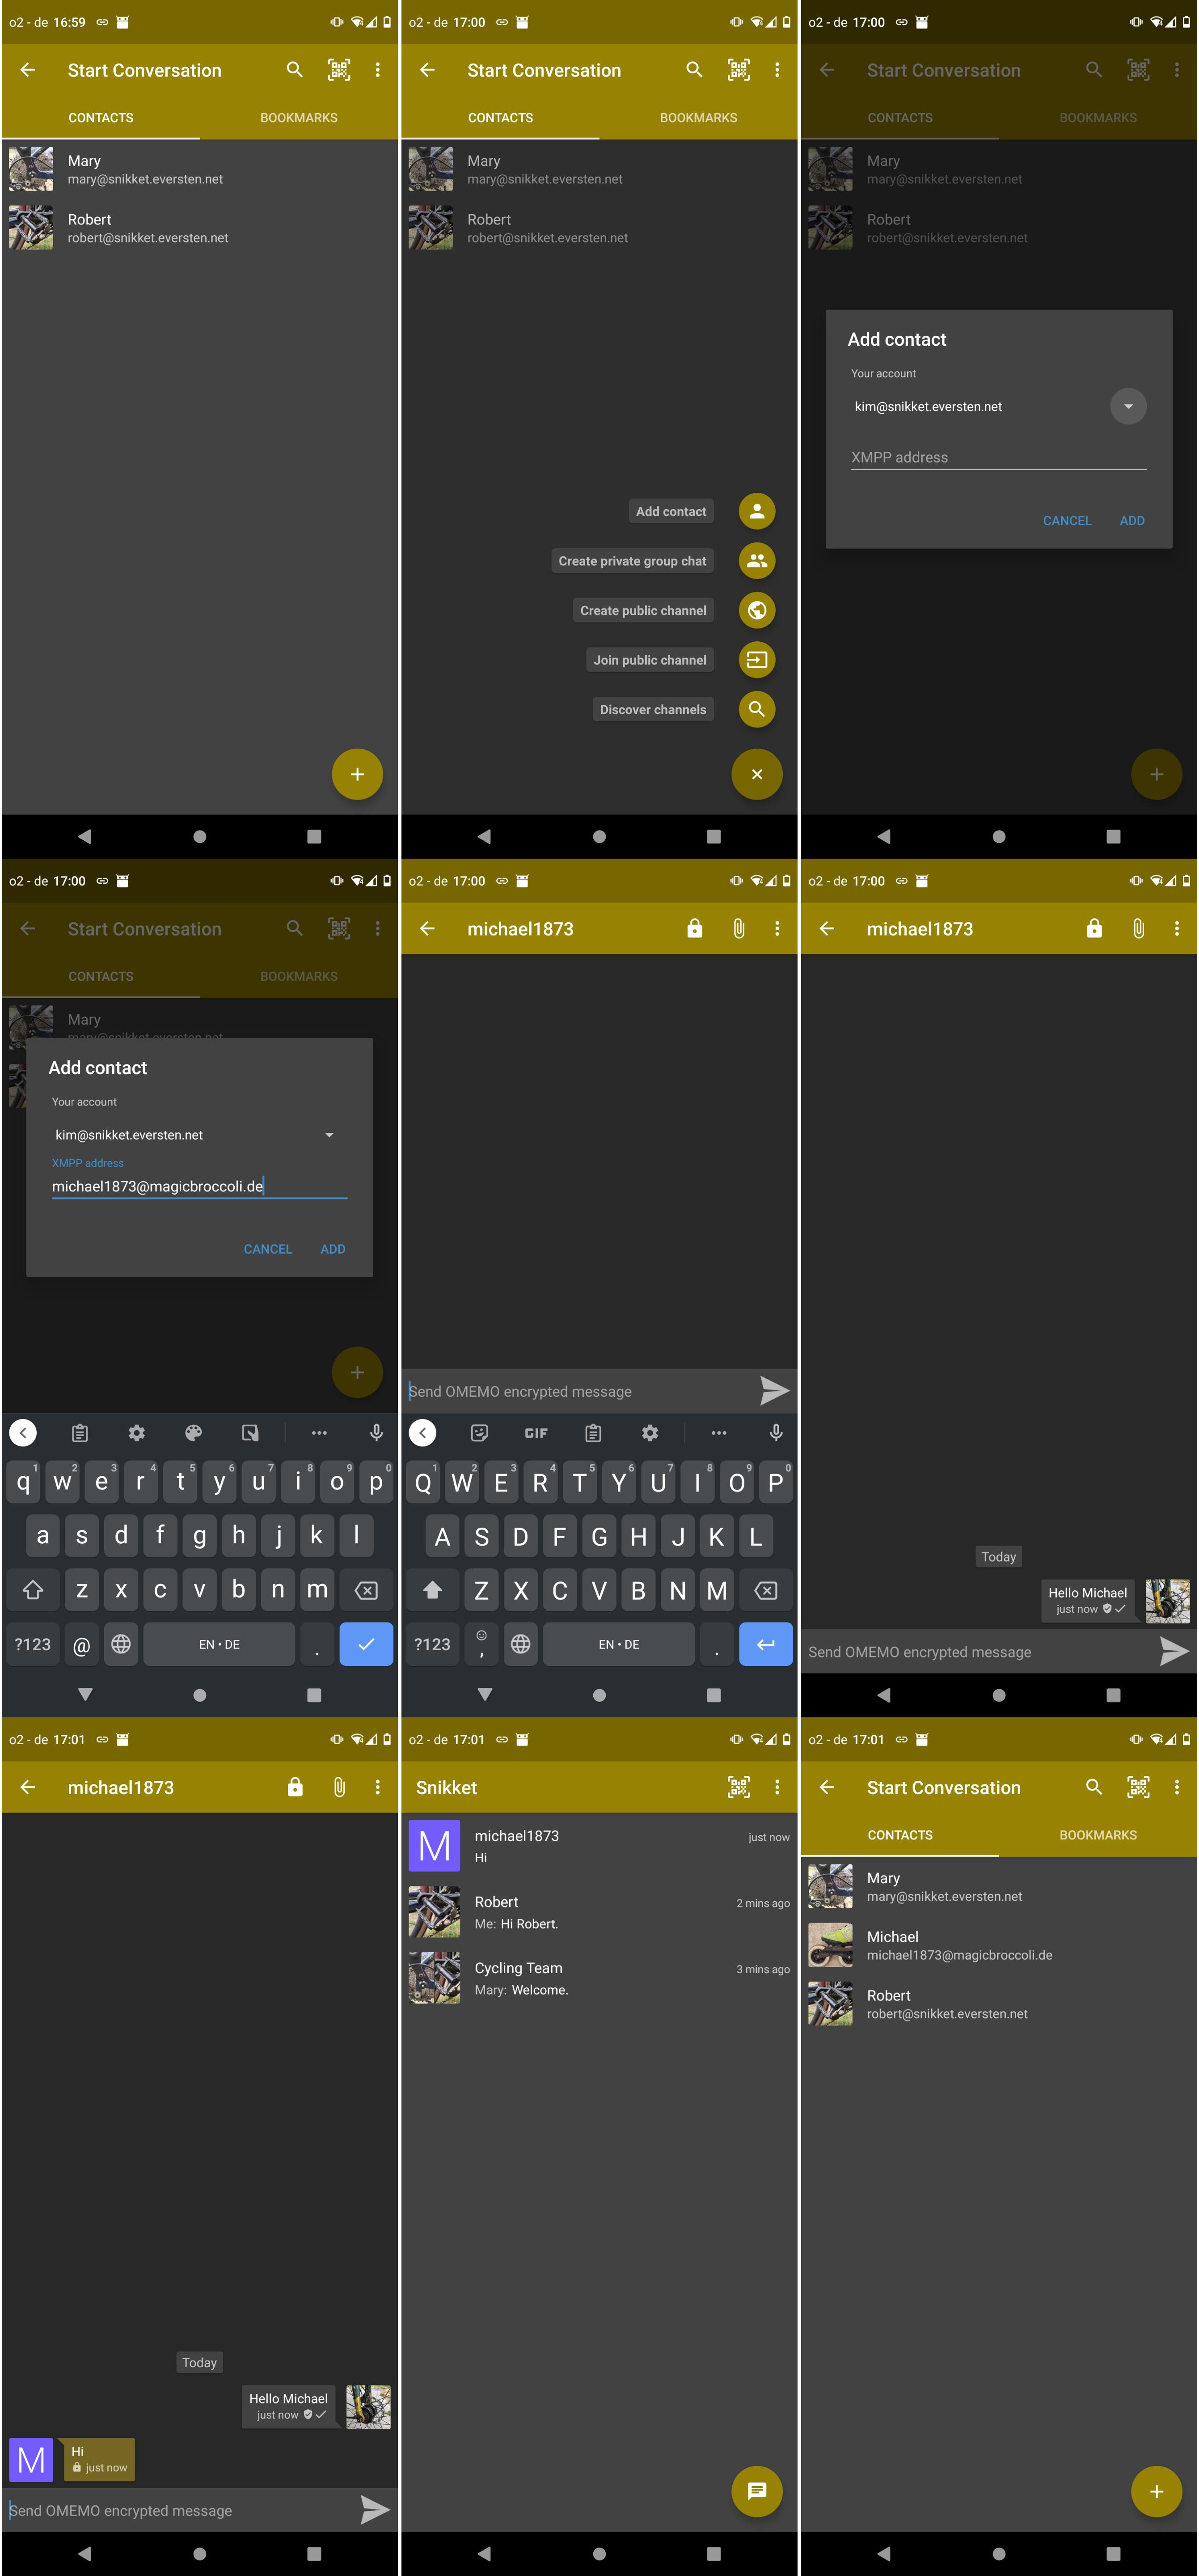
Kim is happy that she can communicate with Michael using the same instant messaging app.
Chapter 5: Removing the permanent notification
Kim recognises that a foreground notification of Snikket is always in her notification area. She swipes from the top of the screen to the bottom to see it. Then she touches the notification for 1-2 seconds. She clicks on the gear icon which appears. She is taken to a menu for Snikket where she can disable the notification for the Foreground Service. She disables it and leaves this menu by clicking the the Back icon.
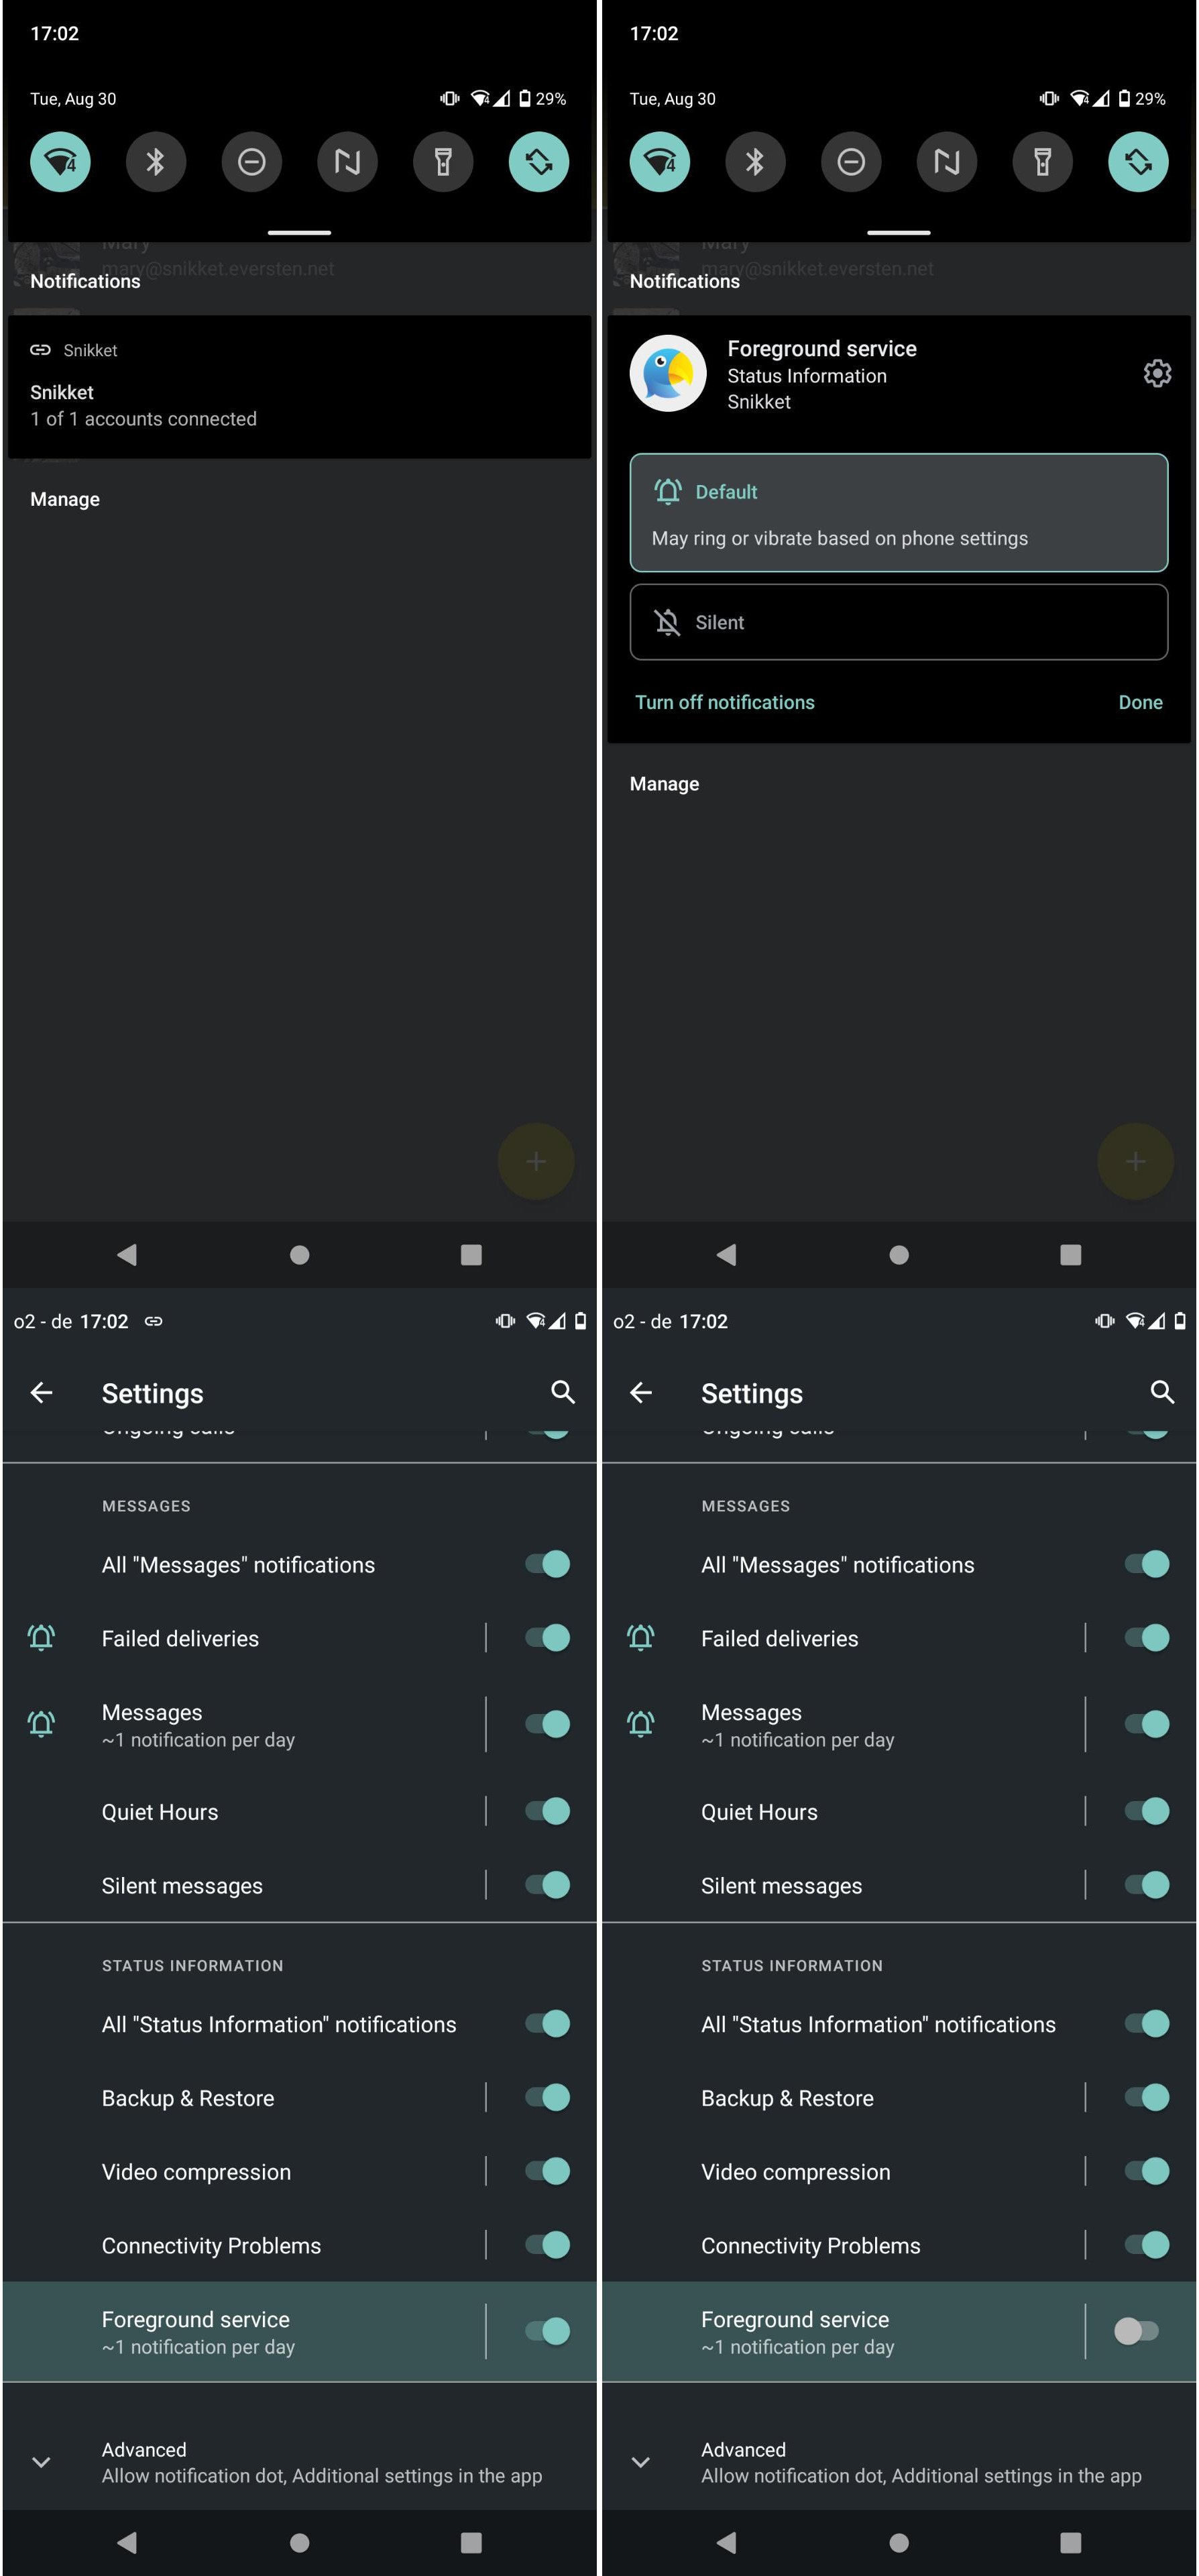
The notification is not shown anymore.
Chapter 6: Understanding Snikket
Kim is a bit confused. Mary said she invites her to Snikket. But Michael said he uses XMPP and she can communicate with him. What is she really using: Snikket or XMPP? She asks Mary about it.
Mary explains in a few words:
- There is an instant messaging standard called XMPP.
- Everyone is allowed to implement a software which uses XMPP. They all can (if they want to) communicate with each other.
- When you use it, you have an XMPP address (used for chatting) which looks like an e-mail address.
- Snikket is a project which offers XMPP software for iOS, Android and a server software which Mary uses to run snikket.eversten.net.
- Every user has the freedom to choose which software he/she wants to use on his/her device and which server (provider) he/she wants to connect to.
- Snikket uses the XMPP standard. This means that Kim can communicate with other people (like Michael) who are also using XMPP.
Kim is excited. She likes the idea that she (as a user) can decide which app and which provider she uses.
But now it’s time to start cycling.