Installation and configuration of Monal
Monal is a good choice if you want to use an XMPP account on your iPhone or iPad. You can get Monal from the App Store (external).
Monal has some nice feature:
- encrypted chats
- encrypted groupchats
- encrypted audio- and videocalls (starting with version 6.1)
- sending and receiving files/pictures
- recording and sending/receiving voice messages
- Sending your geolocation
- creation/configuration of groupchats (starting with version 6.2)
Registering an XMPP account
At first you should register an XMPP address (if you do not already have one). You have the choice between a lot of different XMPP providers. Your XMPP address will be the username you choose followed by the @-sign and the domain of the chosen provider.
In this tutorial, I will register an account at jabbers.one (extern). The registration process for the address everstentutorial@jabbers.one looks as follows:

Of course, you can choose the XMPP-provider you like. It might be helpful for you to have a look at the listings at XMPP.net (external).
Starting Monal for the first time
After downloading Monal from the App Store you can start it by clicking the Monal icon. At first Monal asks you if it is allowed to send notifications. You should allow Monal to do so. Afterwards, you have to enter your XMPP address, your password and finish these steps by clicking Login. Please keep in mind that in this tutorial the XMPP address everstentutorial@jabbers.one is used as an example account.
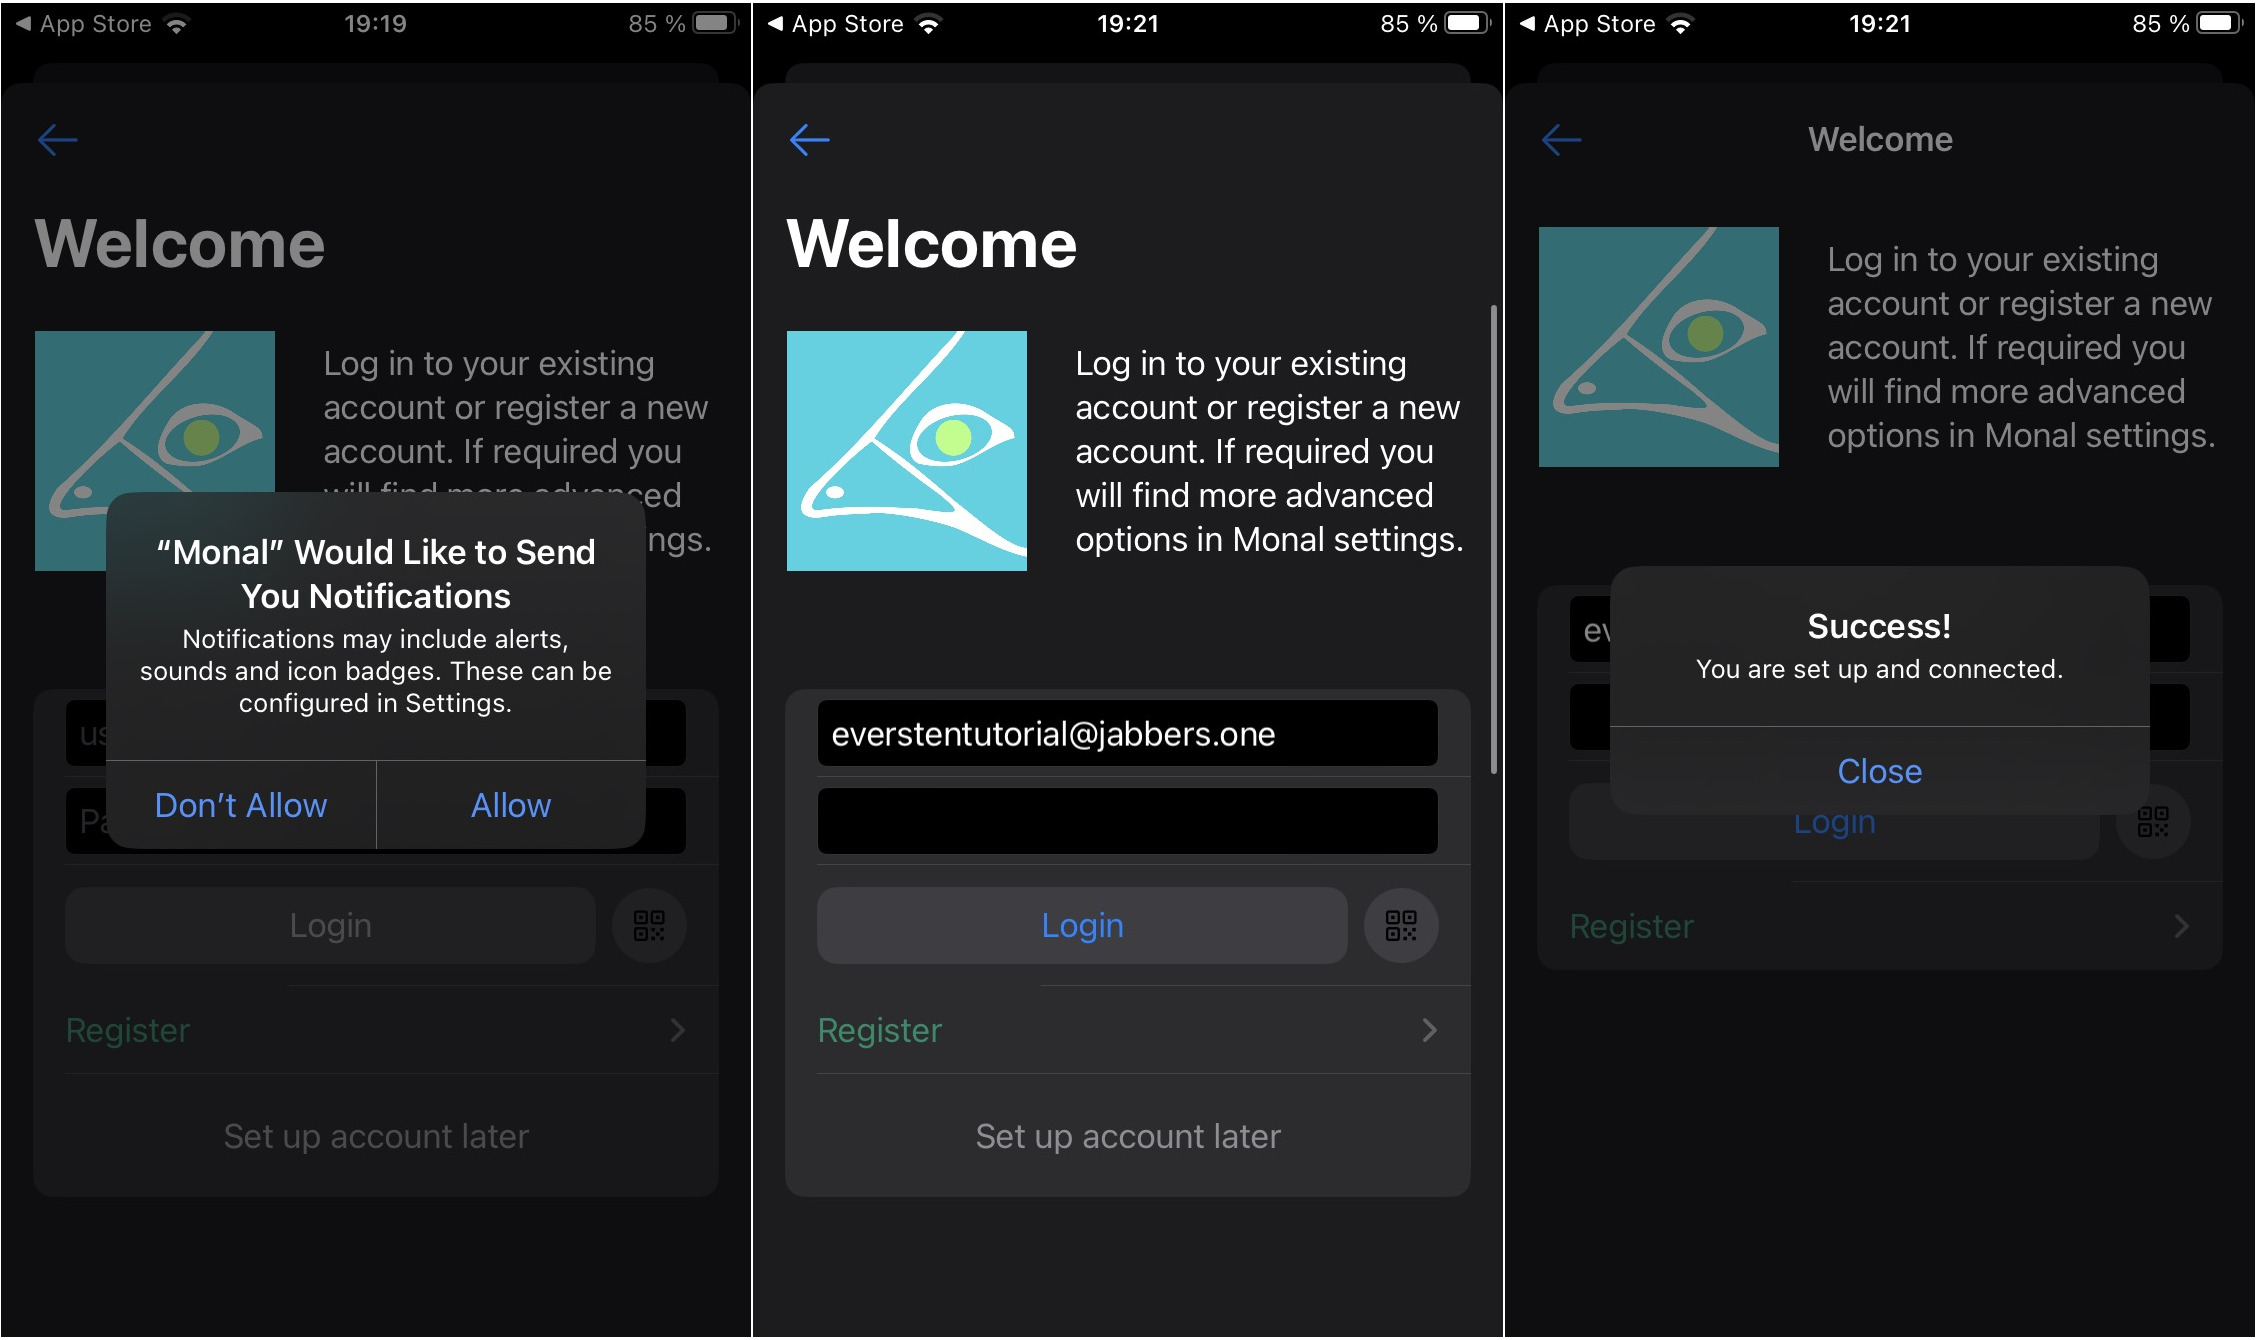
Your XMPP address is now configured to be used in Monal. In the next section I will describe how to add your first contact.
Adding your first contact
Now it is time to add your first contact (in case you already know an XMPP address of another person). In this tutorial the contact max.freedom@magicbroccoli.de will be added.
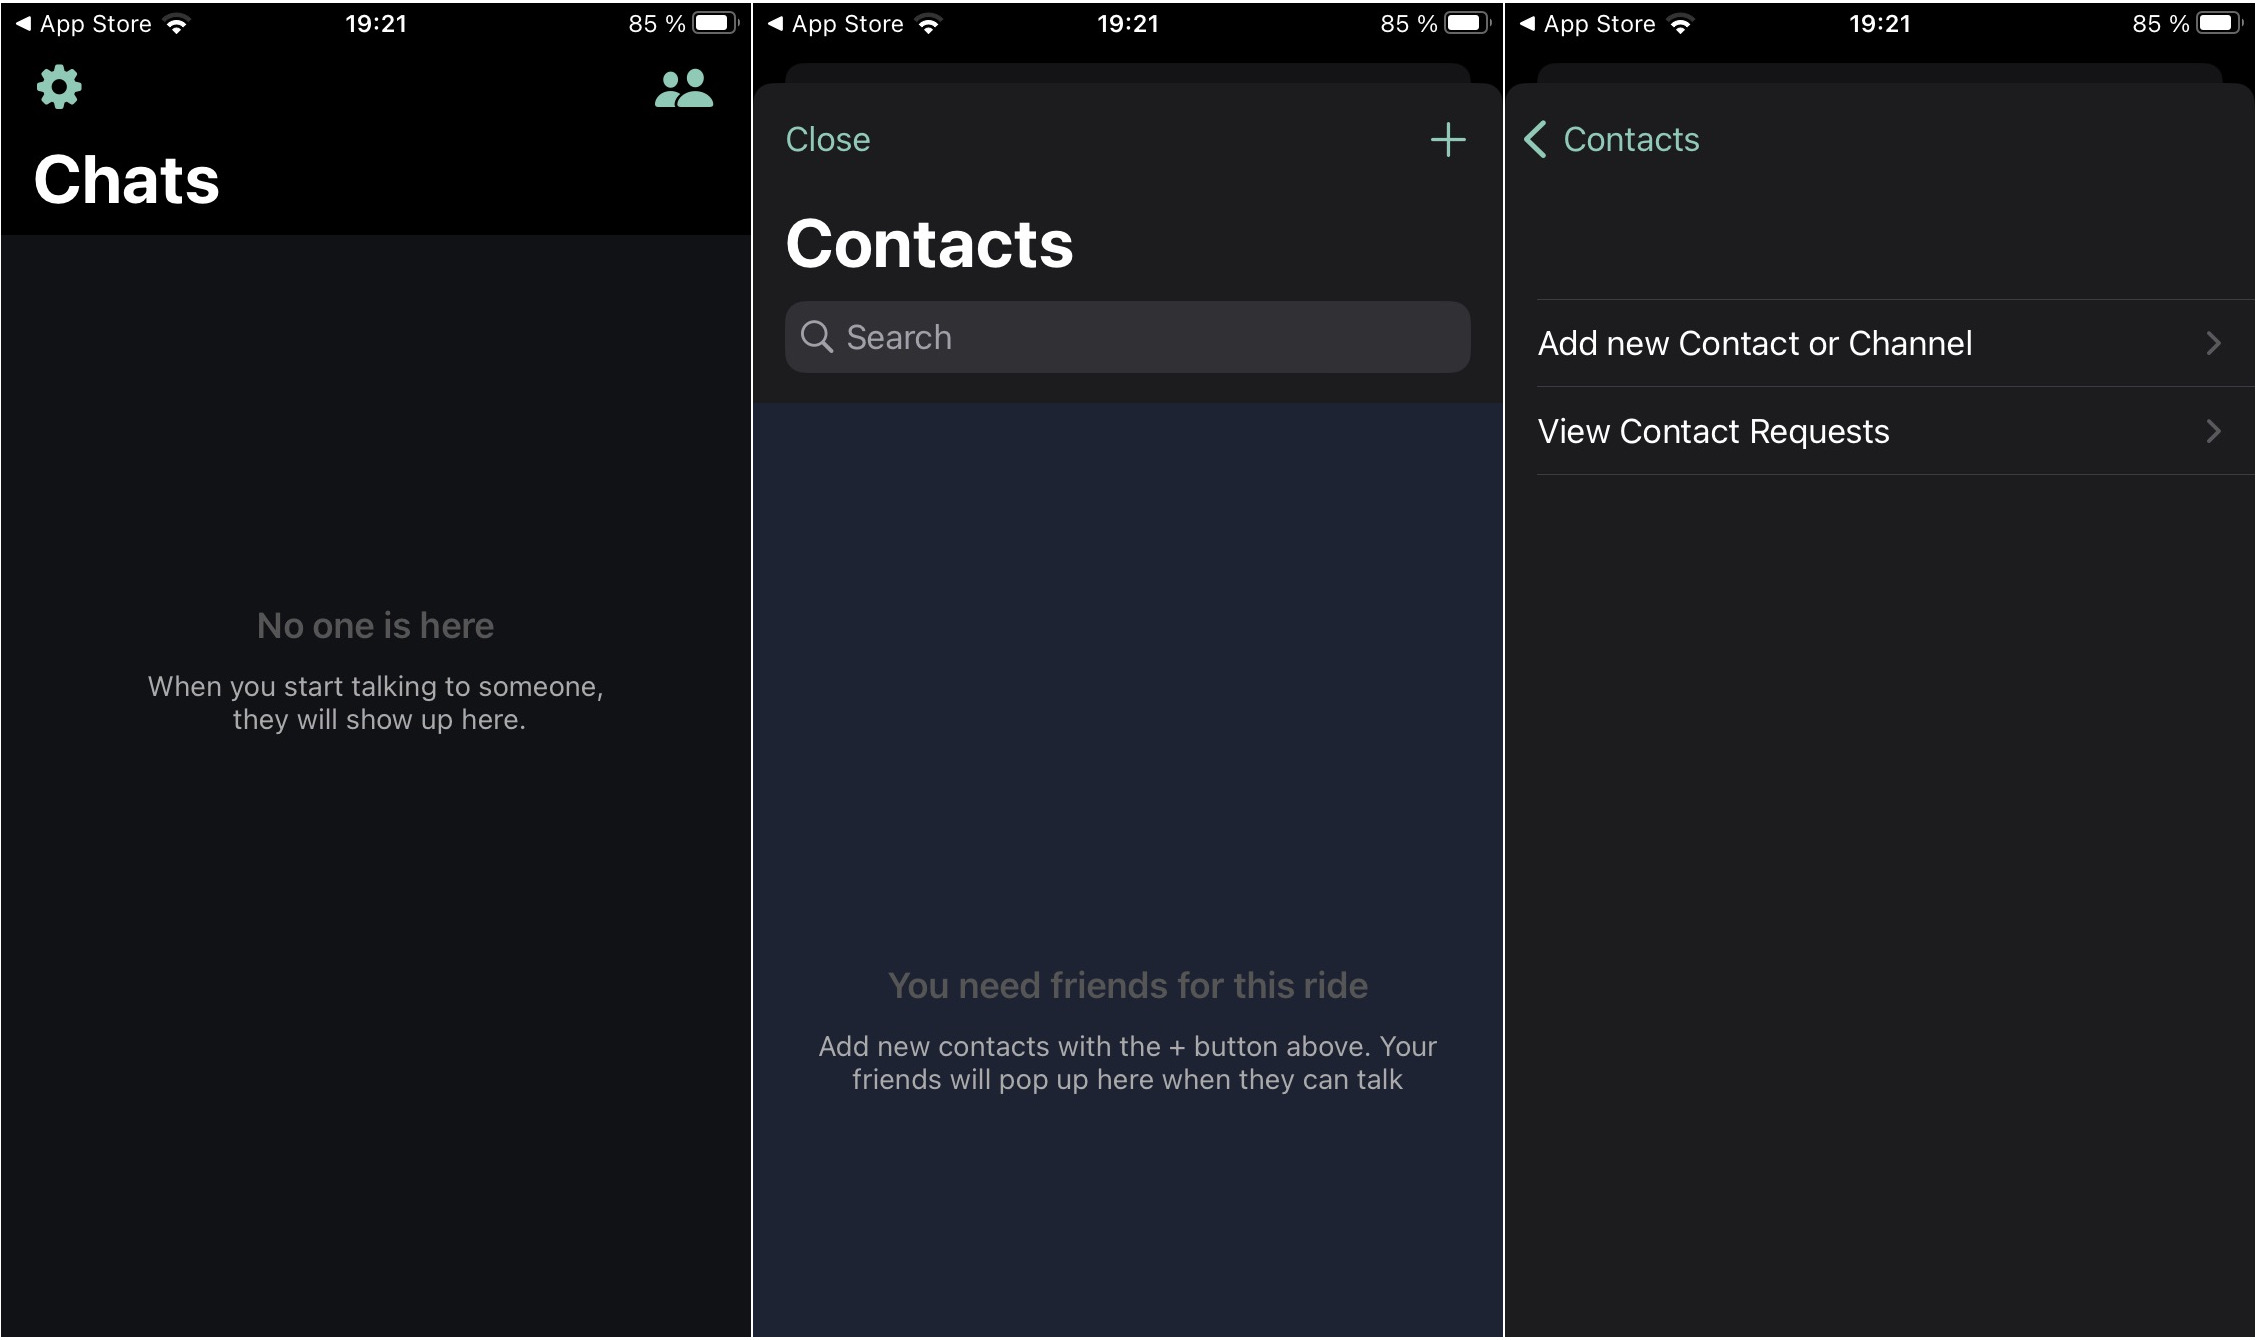
Please click on the icon (showing two persons) at the top right of the screen. You are now in the contacts view. Here you can add a new contact by clicking the +-icon. Now, select Add new Contact or Channel.
You have to enter the XMPP address of your new contact. In this example the XMPP address max.freedom@magicbroccoli.de is used. You have to confirm the address by selecting Add Contact or Channel. Monal informs you that the contact will be added to your contact list as soon as he accepts your request. Monal opens a chat window for this contact.
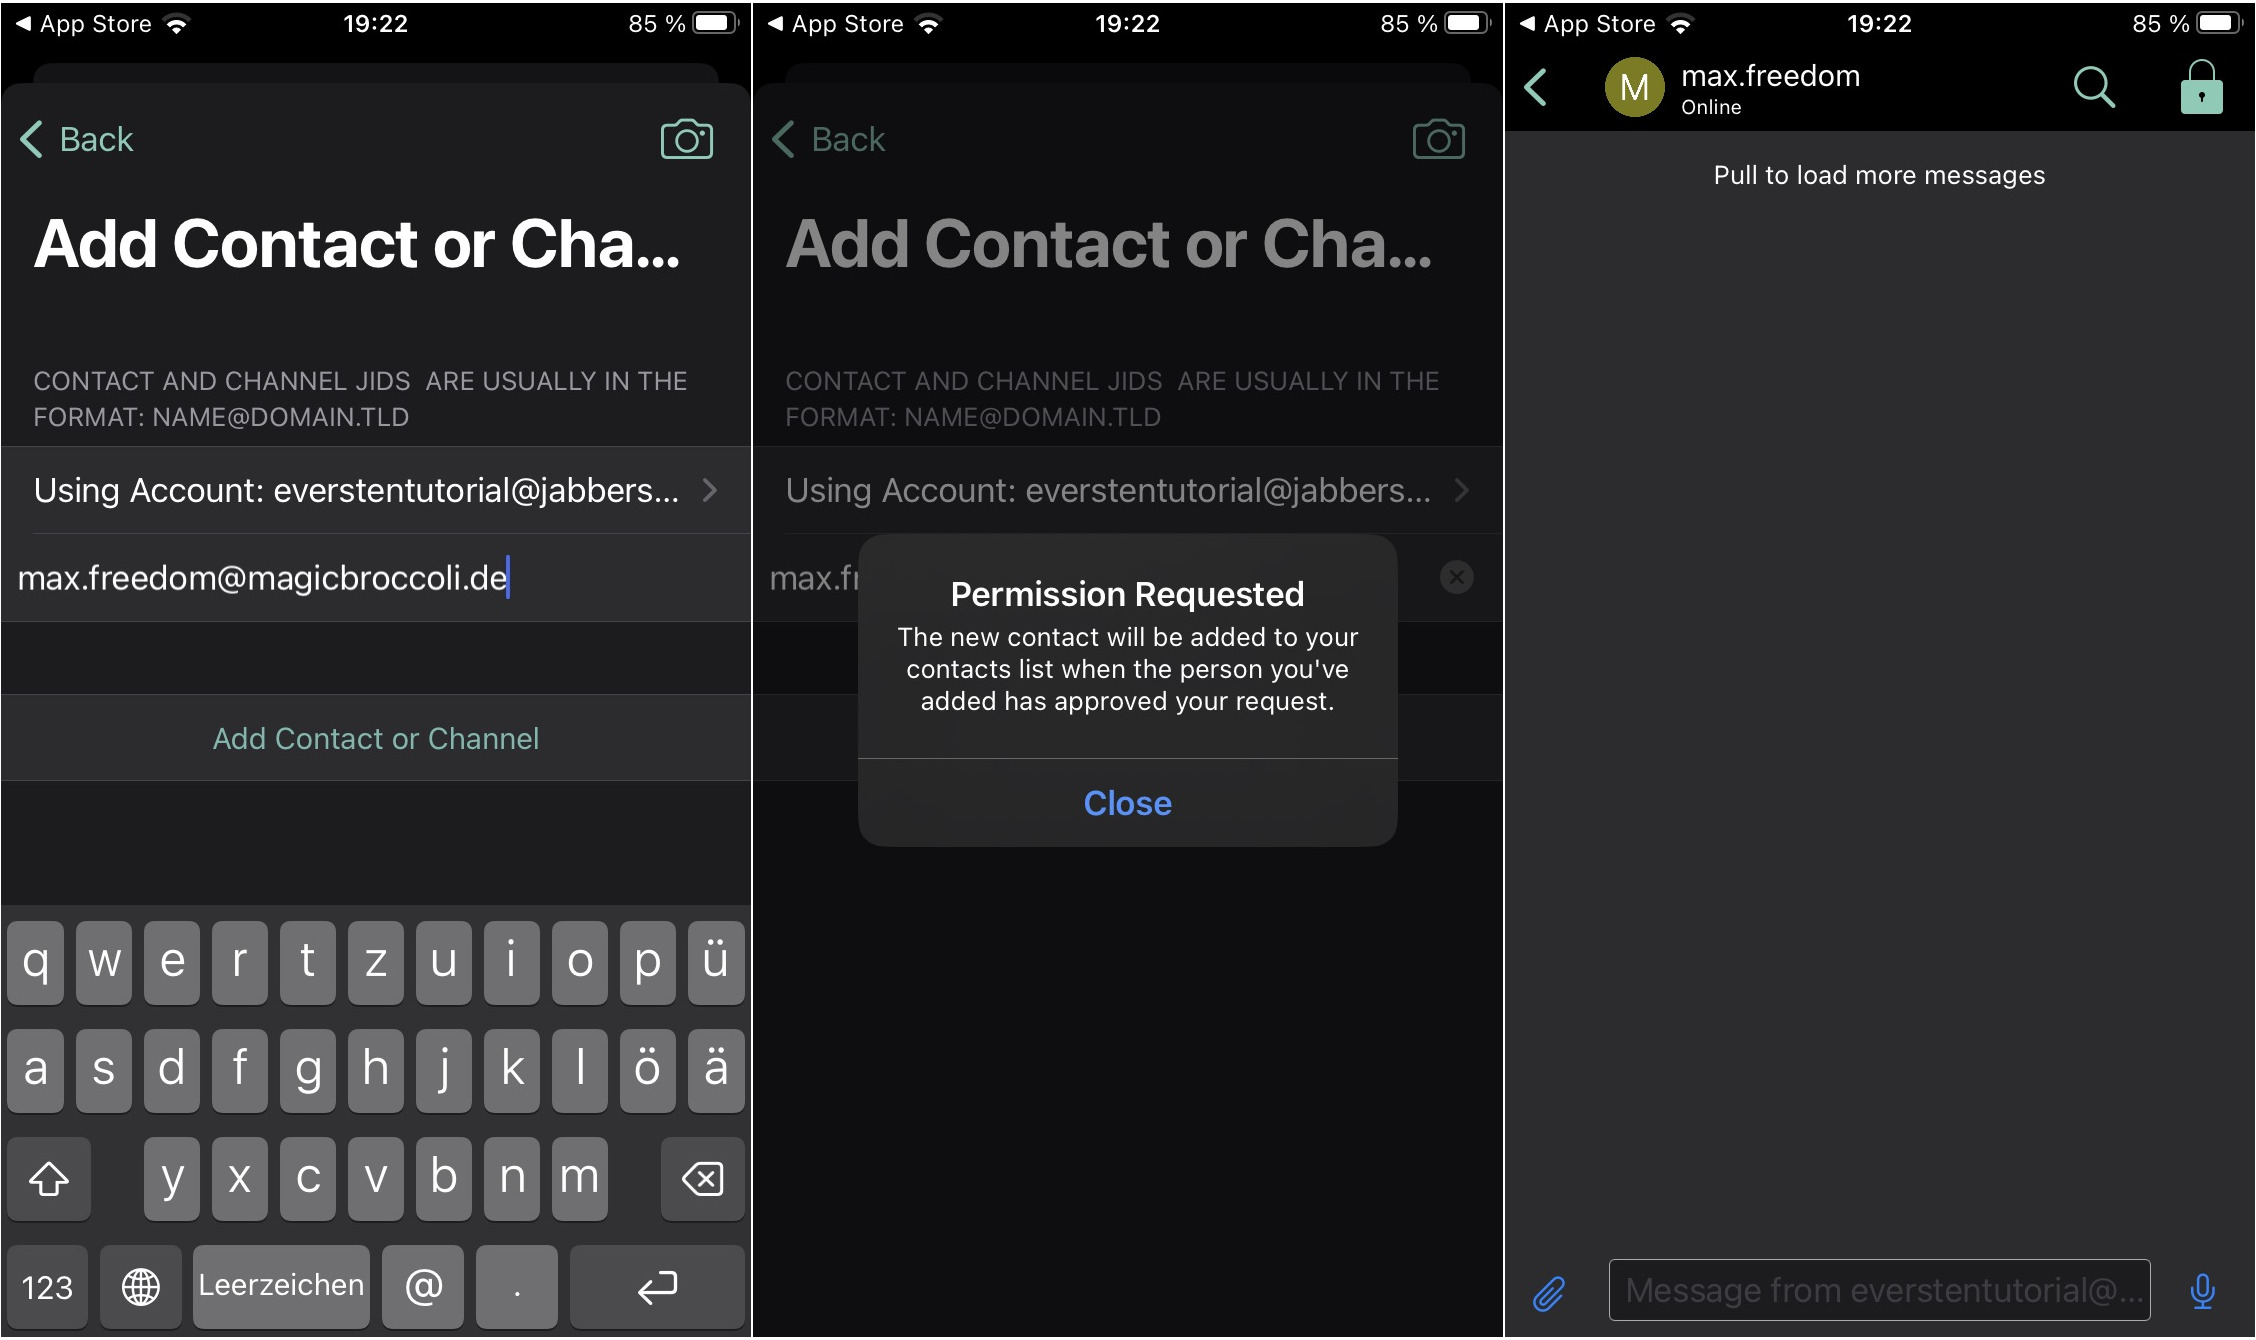
Please be aware that your contact list and the names of your contact are stored on the XMPP server. This means that your contact list is synchronised between all your devices which also use this XMPP account.
Setting a display name
If other persons add you to their contact list, you will simply be displayed as your XMPP address (in this case everstentutorial@jabbers.one). It might be helpful for other people to set a display name (and/or a profile picture).
To do so, you leave the chat with Max Freedom by clicking on the back arrow at the top left. You might have recognised that, in the screenshot below, you can see his real name and profile picture now. This is because in the meantime he authorised everstentutorial to add him to the contact list. In Chats view you have to click on the gear icon to go to Settings. Now, you have to click on your XMPP address (in this case everstentutorial@jabbers.one).
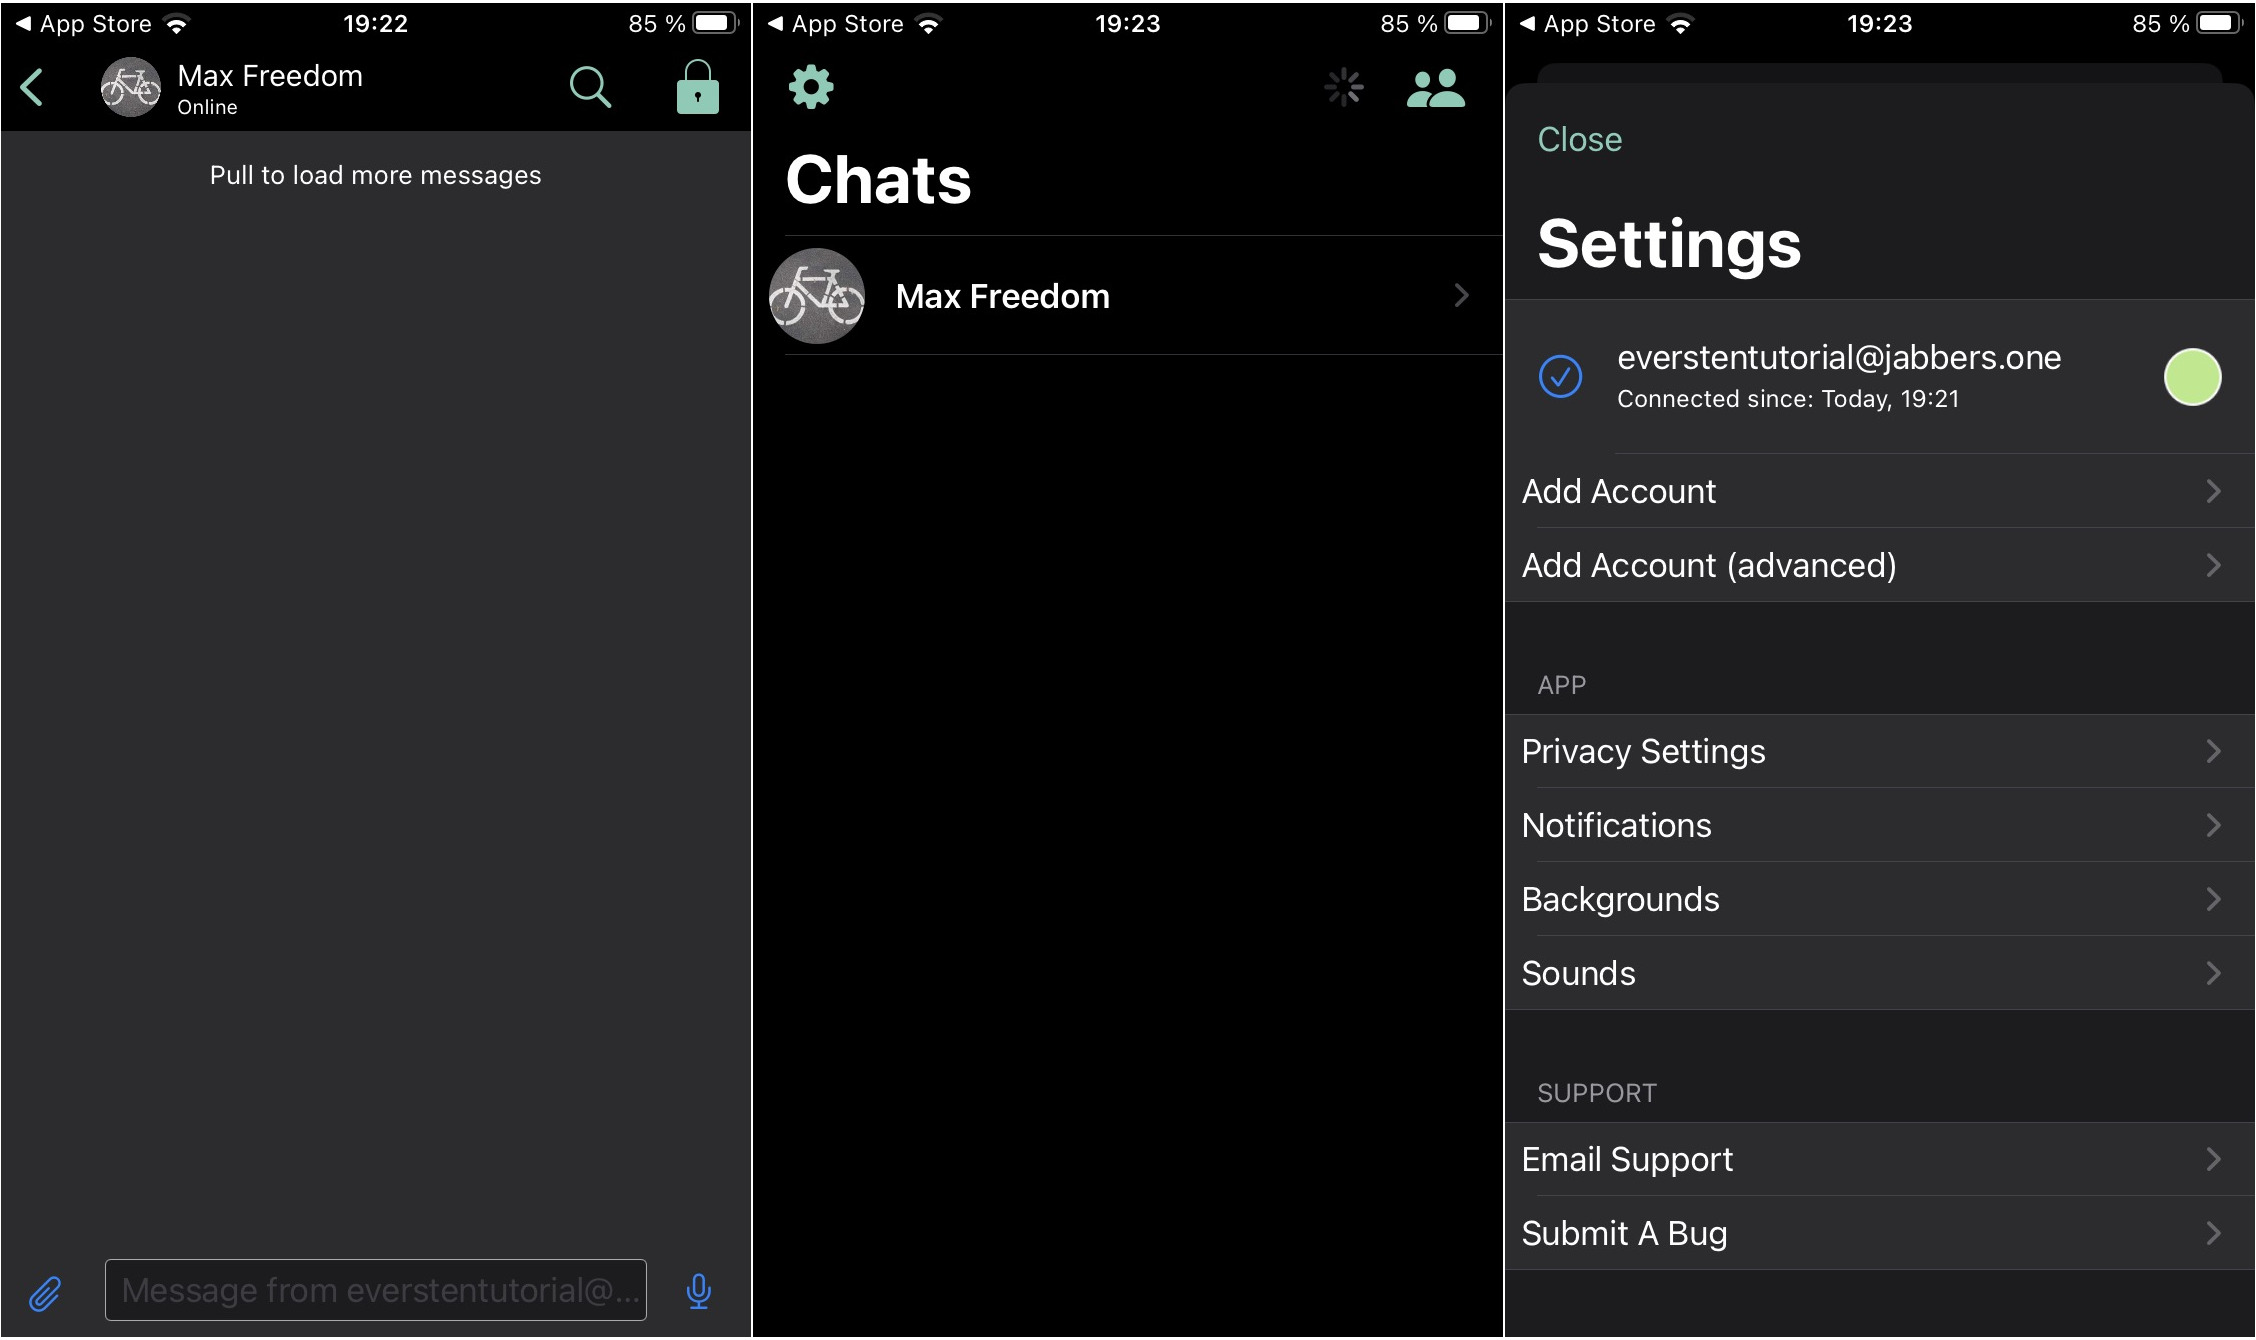
You can edit your account settings. You now have to click on Display Name. Please consider: You have to click on the very right border of this line to change the display name. Then you can enter your desired name. If you also want to add a profile picture, you can click on the placeholder picture (circled letter). Simply click on Save to save your changes and return to the Chats view.
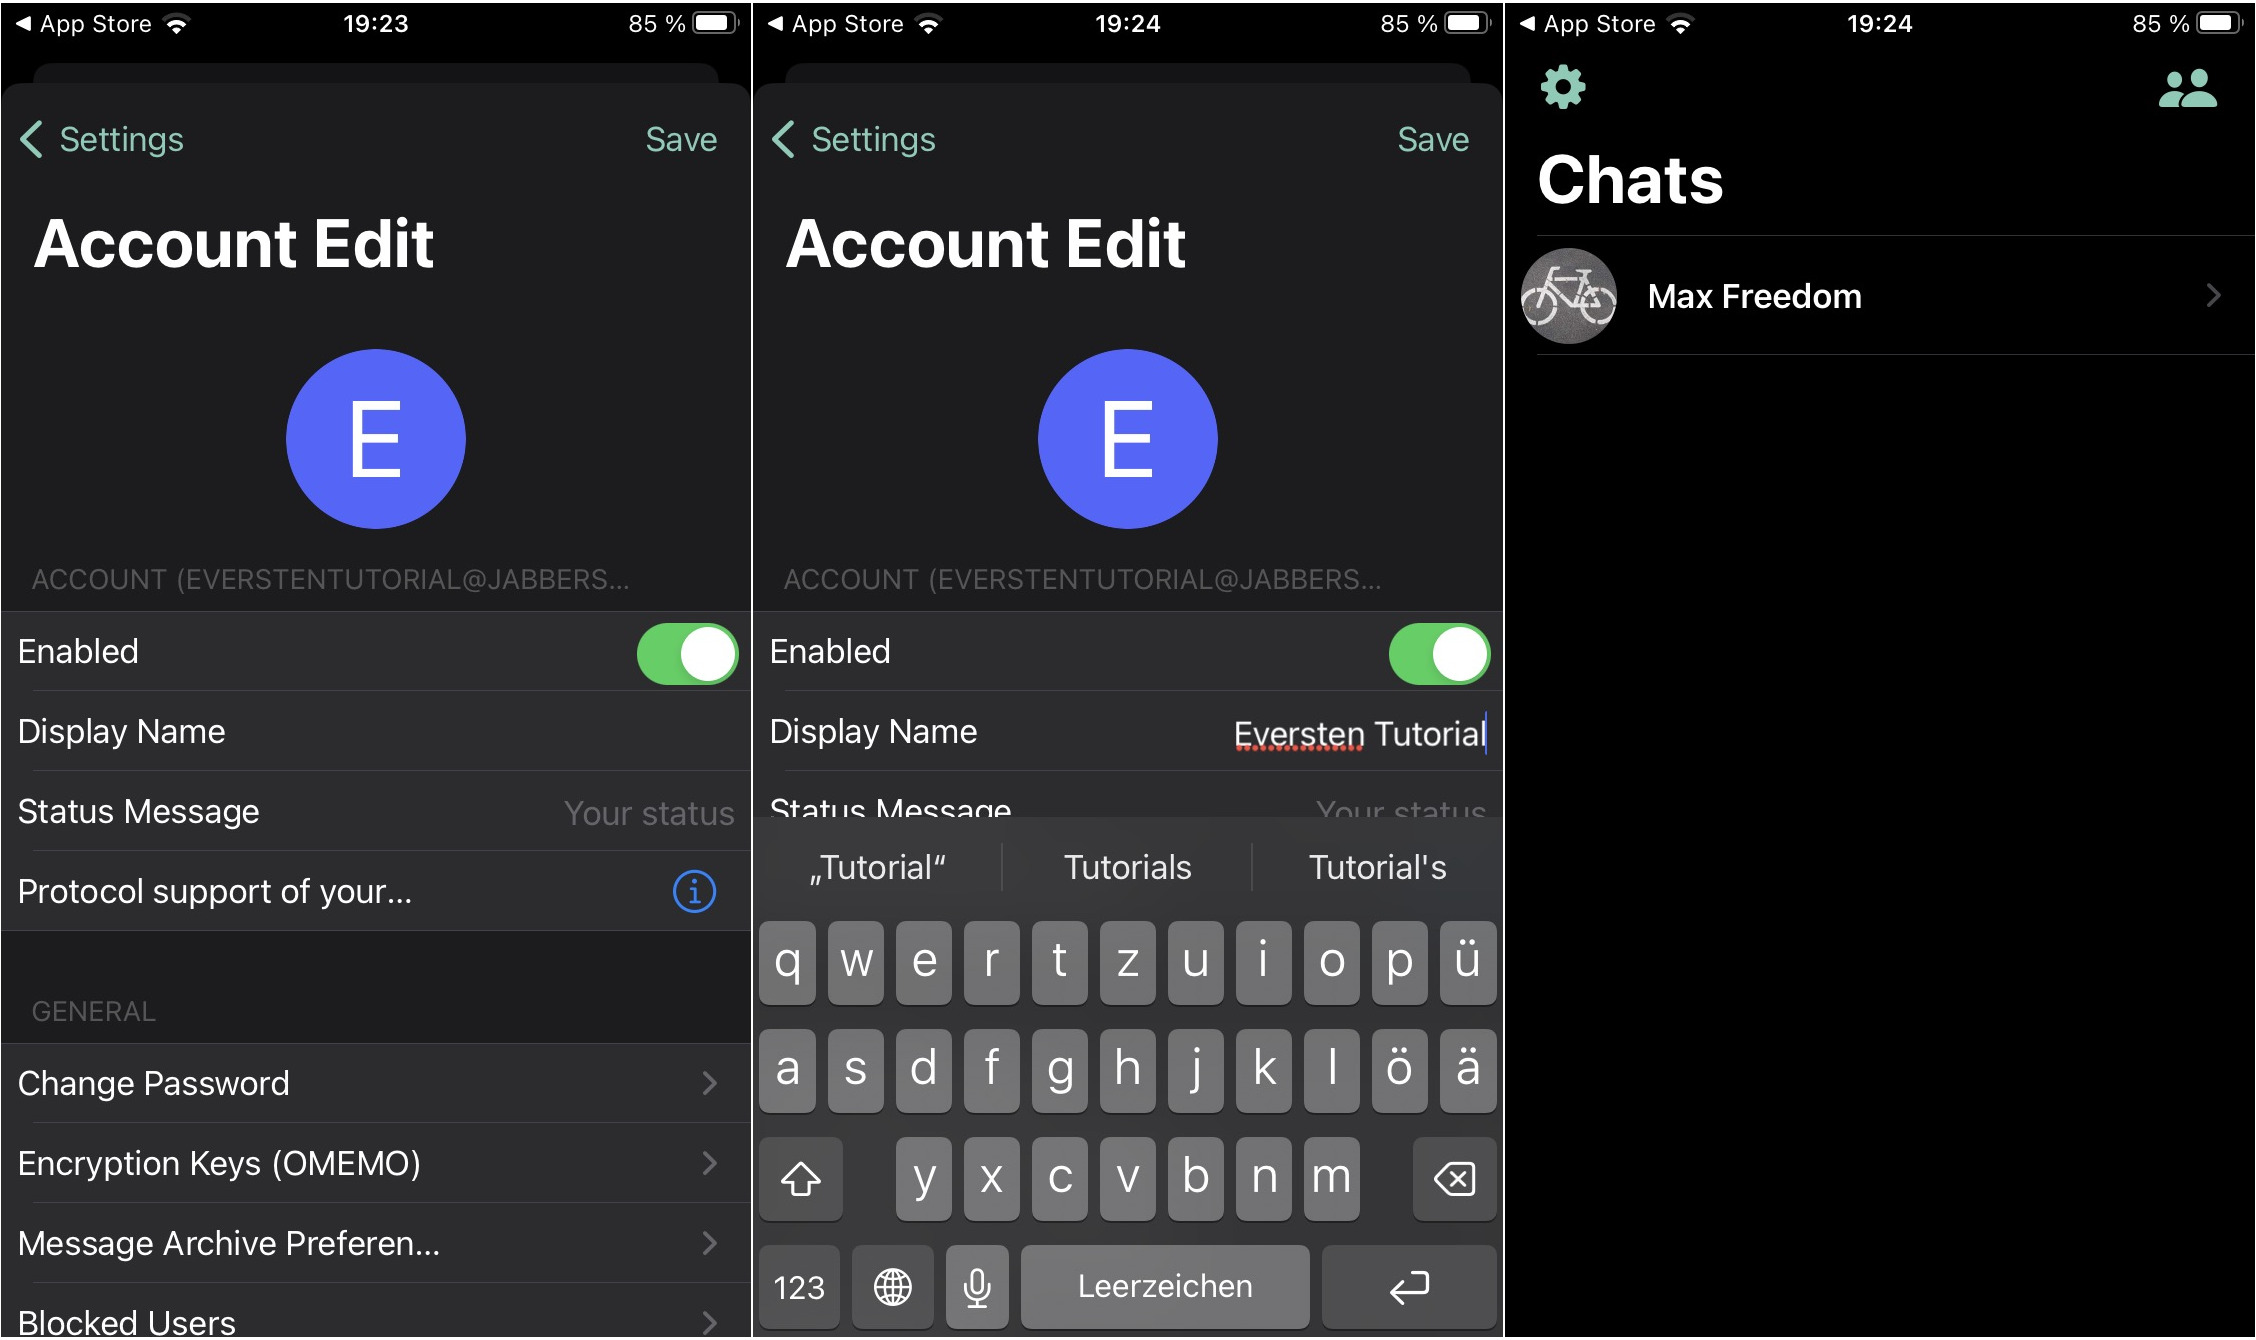
The display name (and maybe a profile picture) is set and will be shown to authorised contacts.
Conclusion
Congratulations. You have registered and XMPP address, installed an XMPP client and optimized the configuration settings. If you do not like Monal and switch to a different app you can use the same XMPP account. You just need to know your XMPP address and your password.